Here you can view a practical example of the main features of the Sales Management Portal.
| Expandir |
|---|
| Expandir |
|---|
| In the Sales Management Portal, you can configure privileges for a user. These privileges are useful to tell the system which PGV menu options the user will be able to access. You may configure them using the options of routine TGVA004, as explained below: | Informações |
|---|
| Privileges are loaded to the portal after the sales representative logs in. If you change the privilege, the change is reflected by the PGV only from the next login of the sales representative onwards. |
| Informações |
|---|
| The actions (Add, Edit and Delete) of the Sales Management Portal cannot be restricted. |
| Totvs custom tabs box |
|---|
| tabs | Privilege Register, Users Register, Adding the Privilege, Accessing the Portal |
|---|
| ids | step1,step2,step3,step4 |
|---|
| | Totvs custom tabs box items |
|---|
| default | yes |
|---|
| referencia | step1 |
|---|
| To configure it, just access the Privileges menu, found in the Configurator module (SIGACFG) → Users → Passwords → Privileges → Add: - In Rules by Transaction/Routine, fill out the field Transaction/Routine with the code of routine TGVA004.
- In Features of Transactions/Routine, select whether the user (Sales Representative) will have access Allowed or Denied to Sales Management Portal menu items.
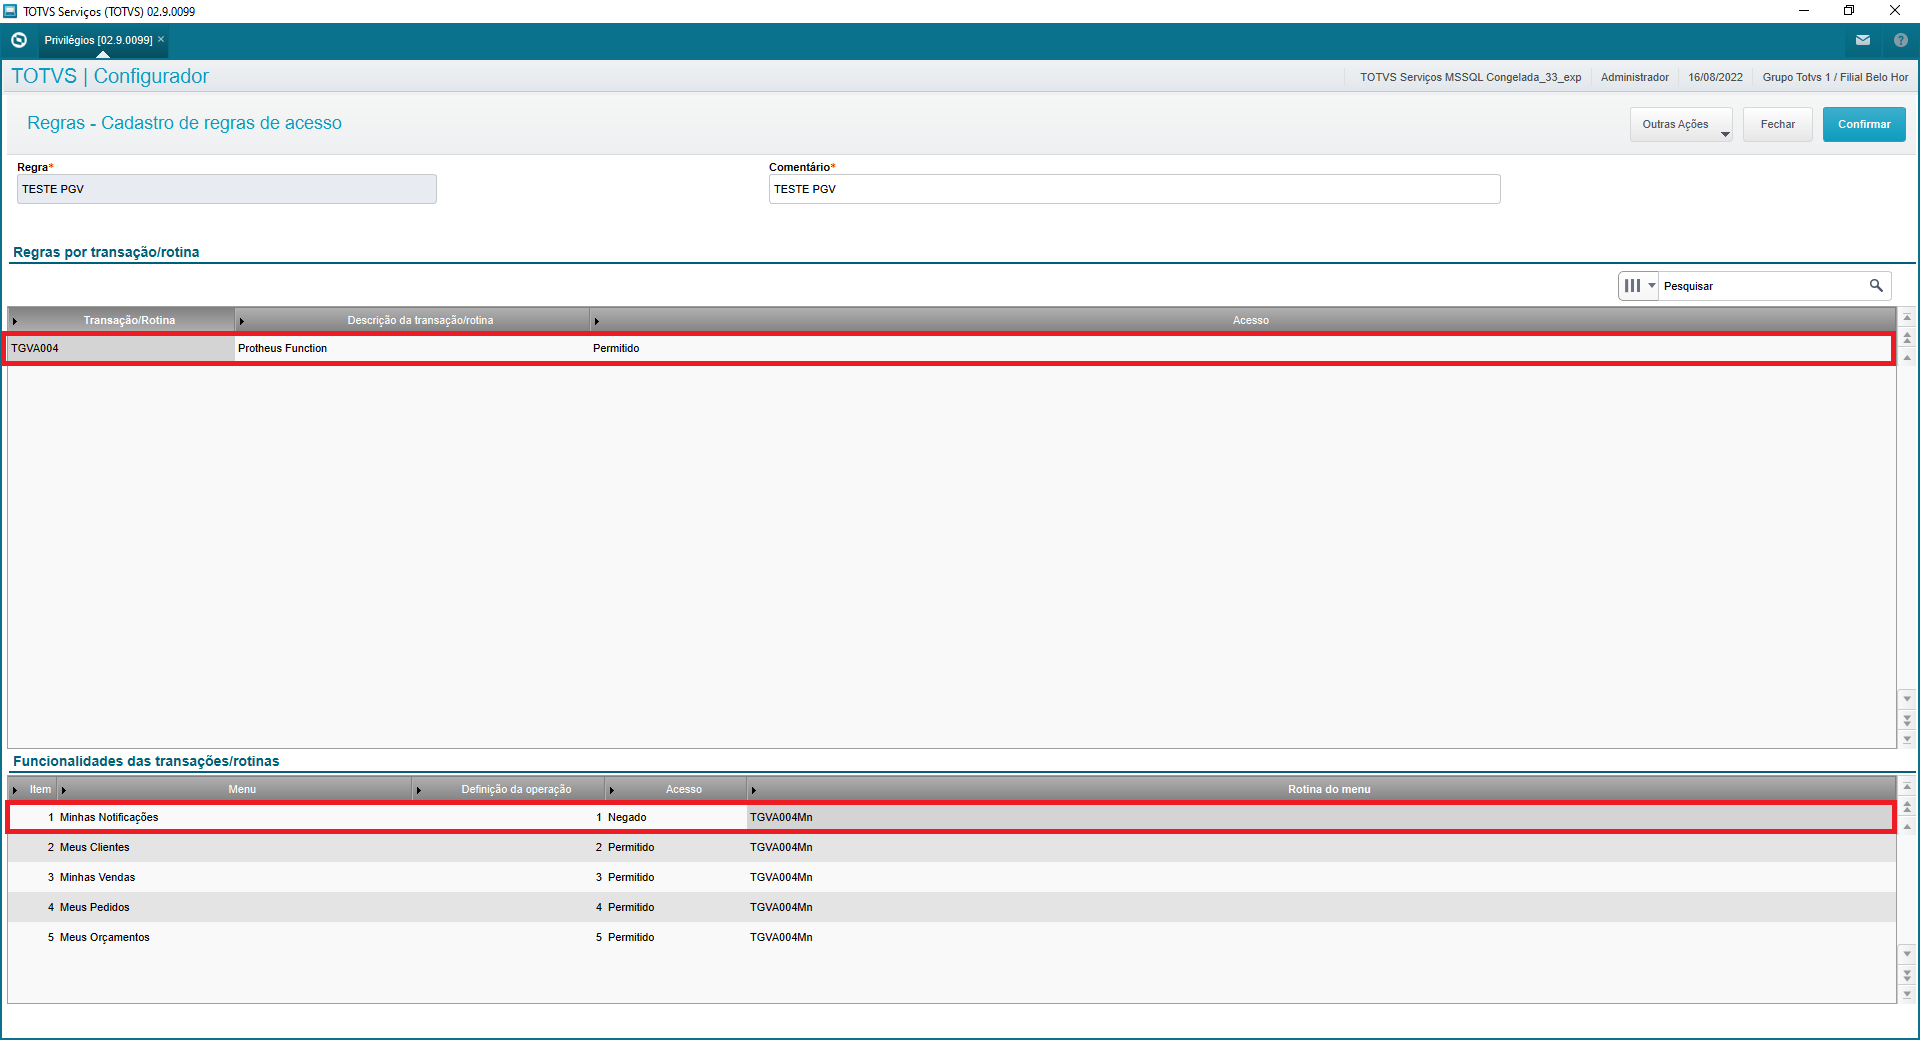
In this example, access to the My Notifications page will be denied. |
| Totvs custom tabs box items |
|---|
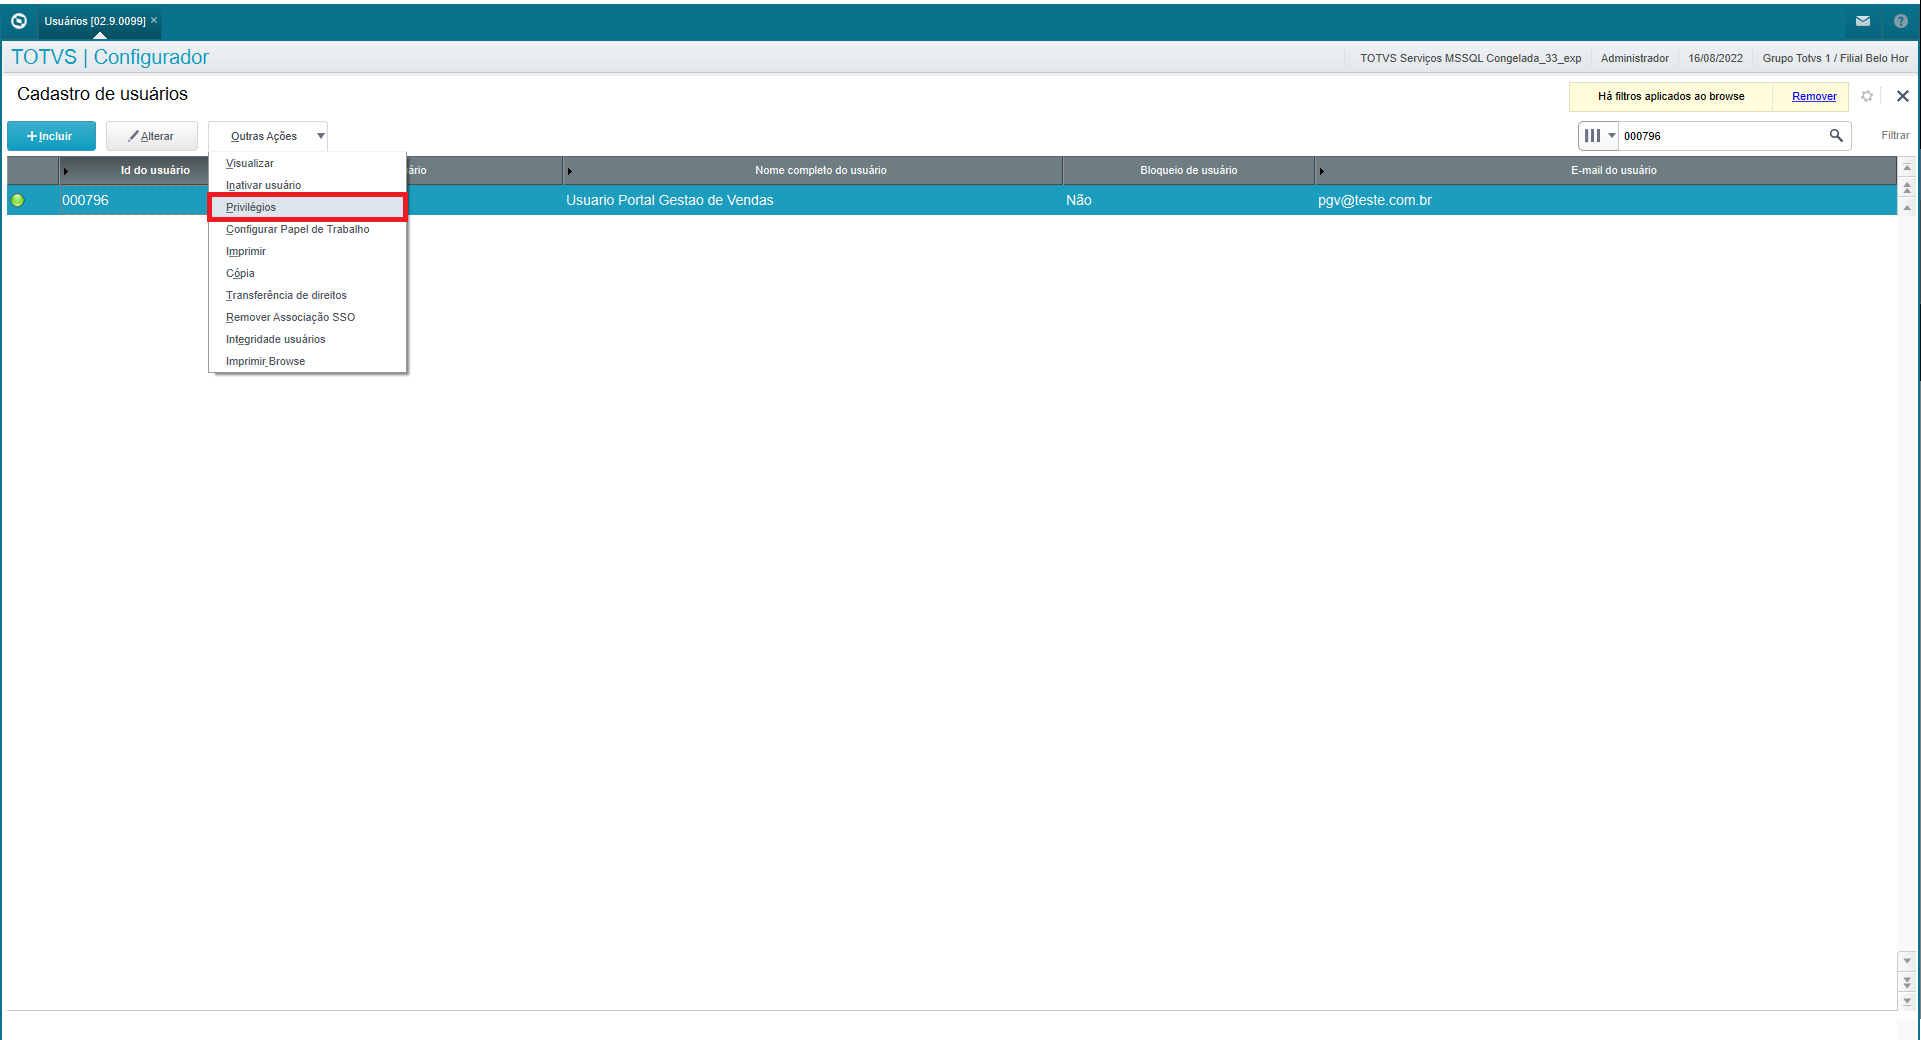
| Access the users register of the Configurator module (SIGACFG) and add the privilege to the user selected. SIGACFG → Users → Passwords → Users → Find the user desired → Other Actions → Privileges
|
| Totvs custom tabs box items |
|---|
| In Access Restrictions select the previously registered rule (Step 1). 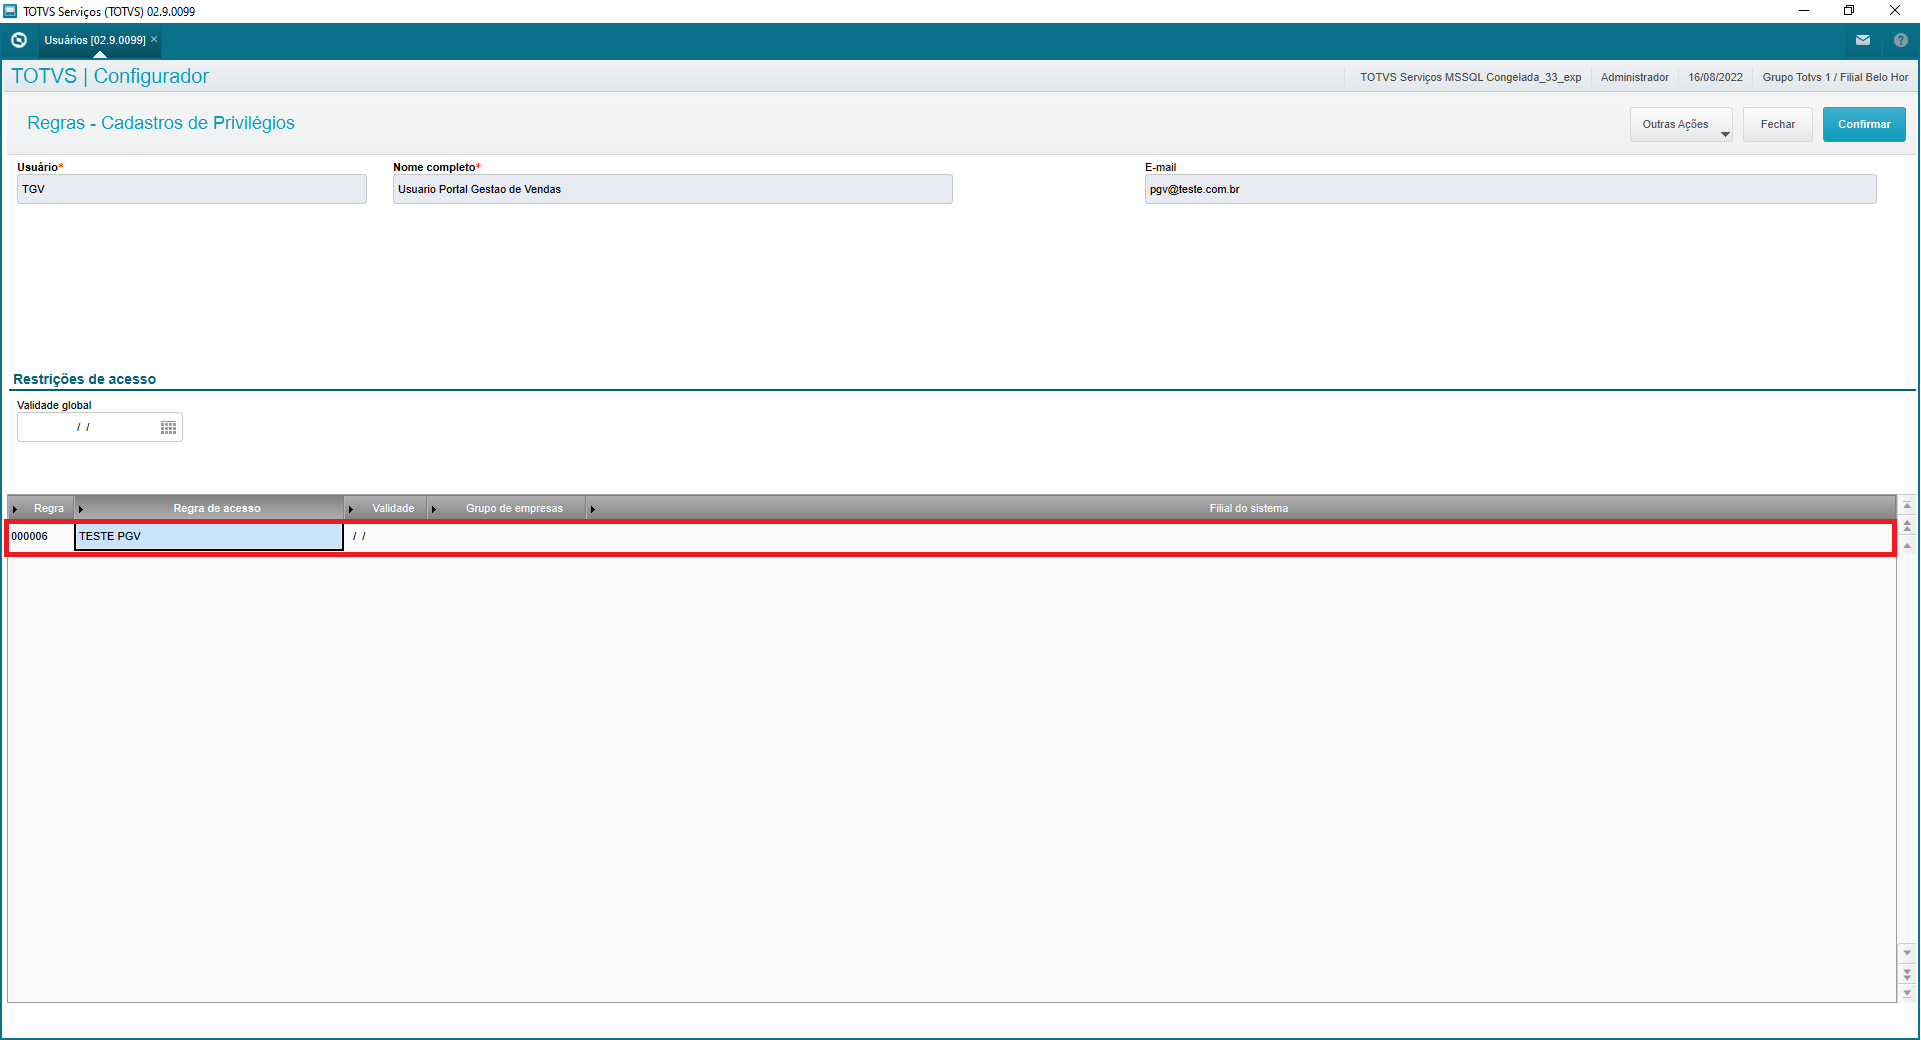
|
| Totvs custom tabs box items |
|---|
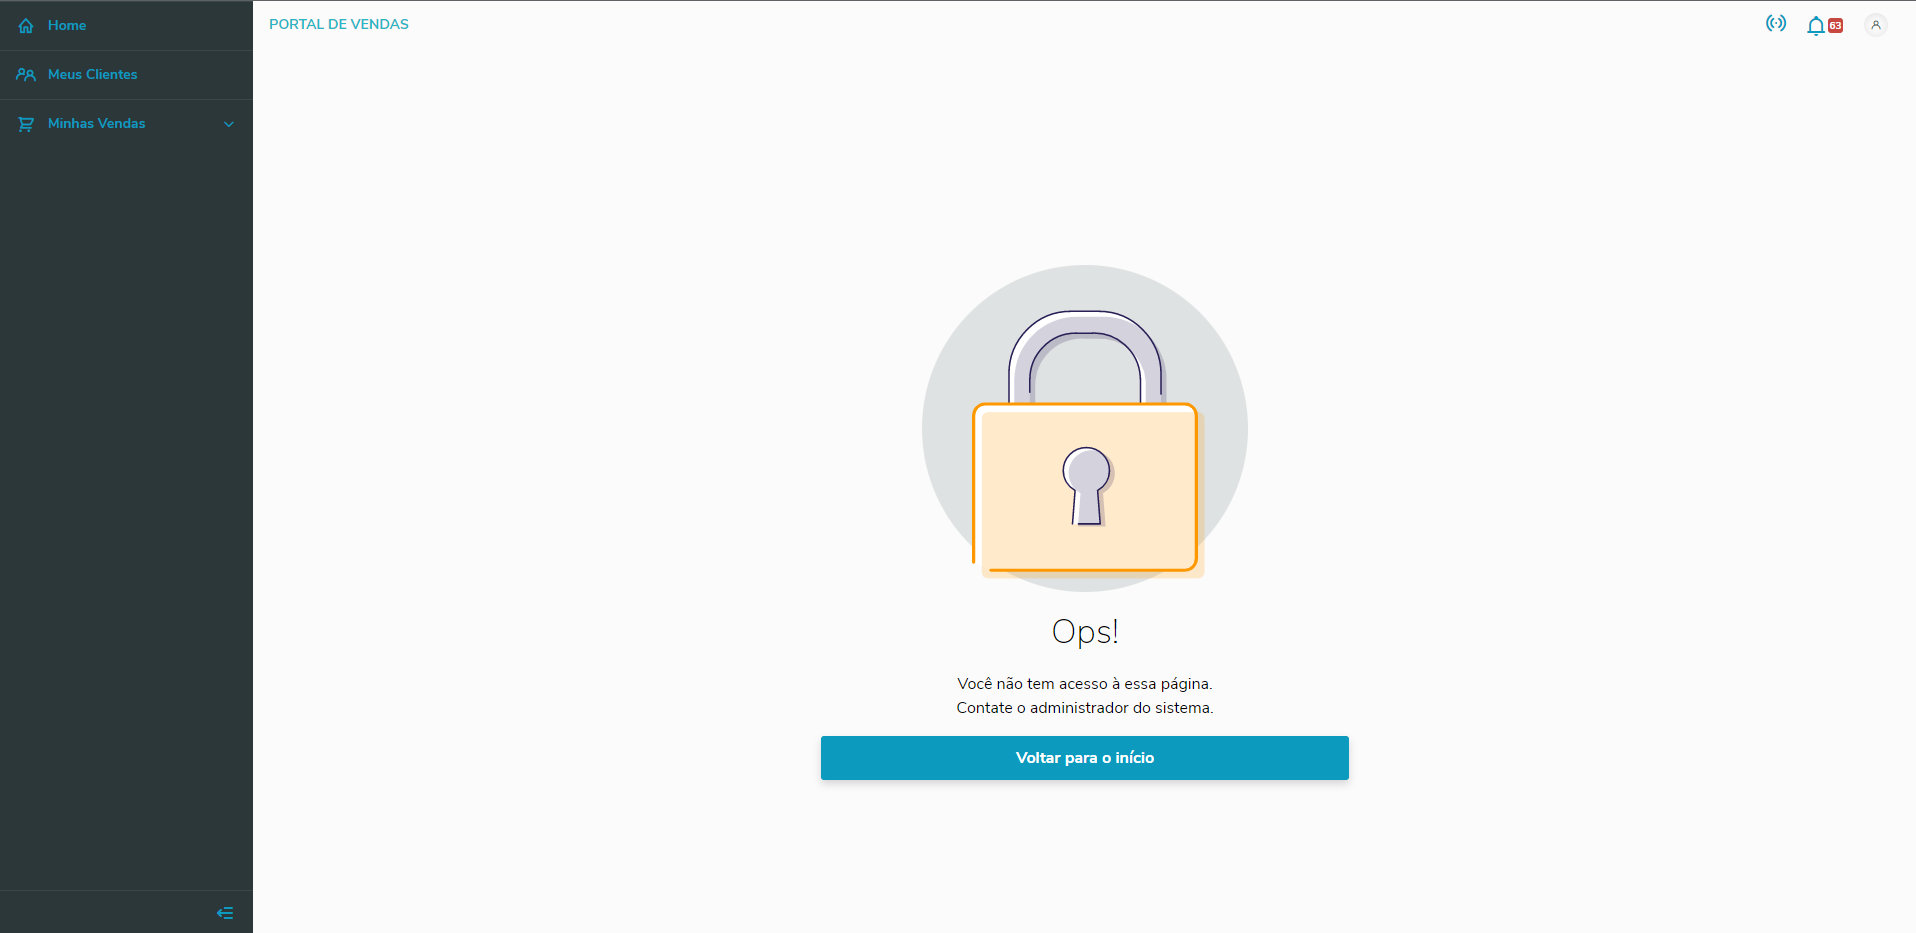
| Upon accessing the Sales Management Portal, the Sales Representative will neither have access to the page nor to the menu. In this example, the Sales Representative lacks access to the page My Notifications.
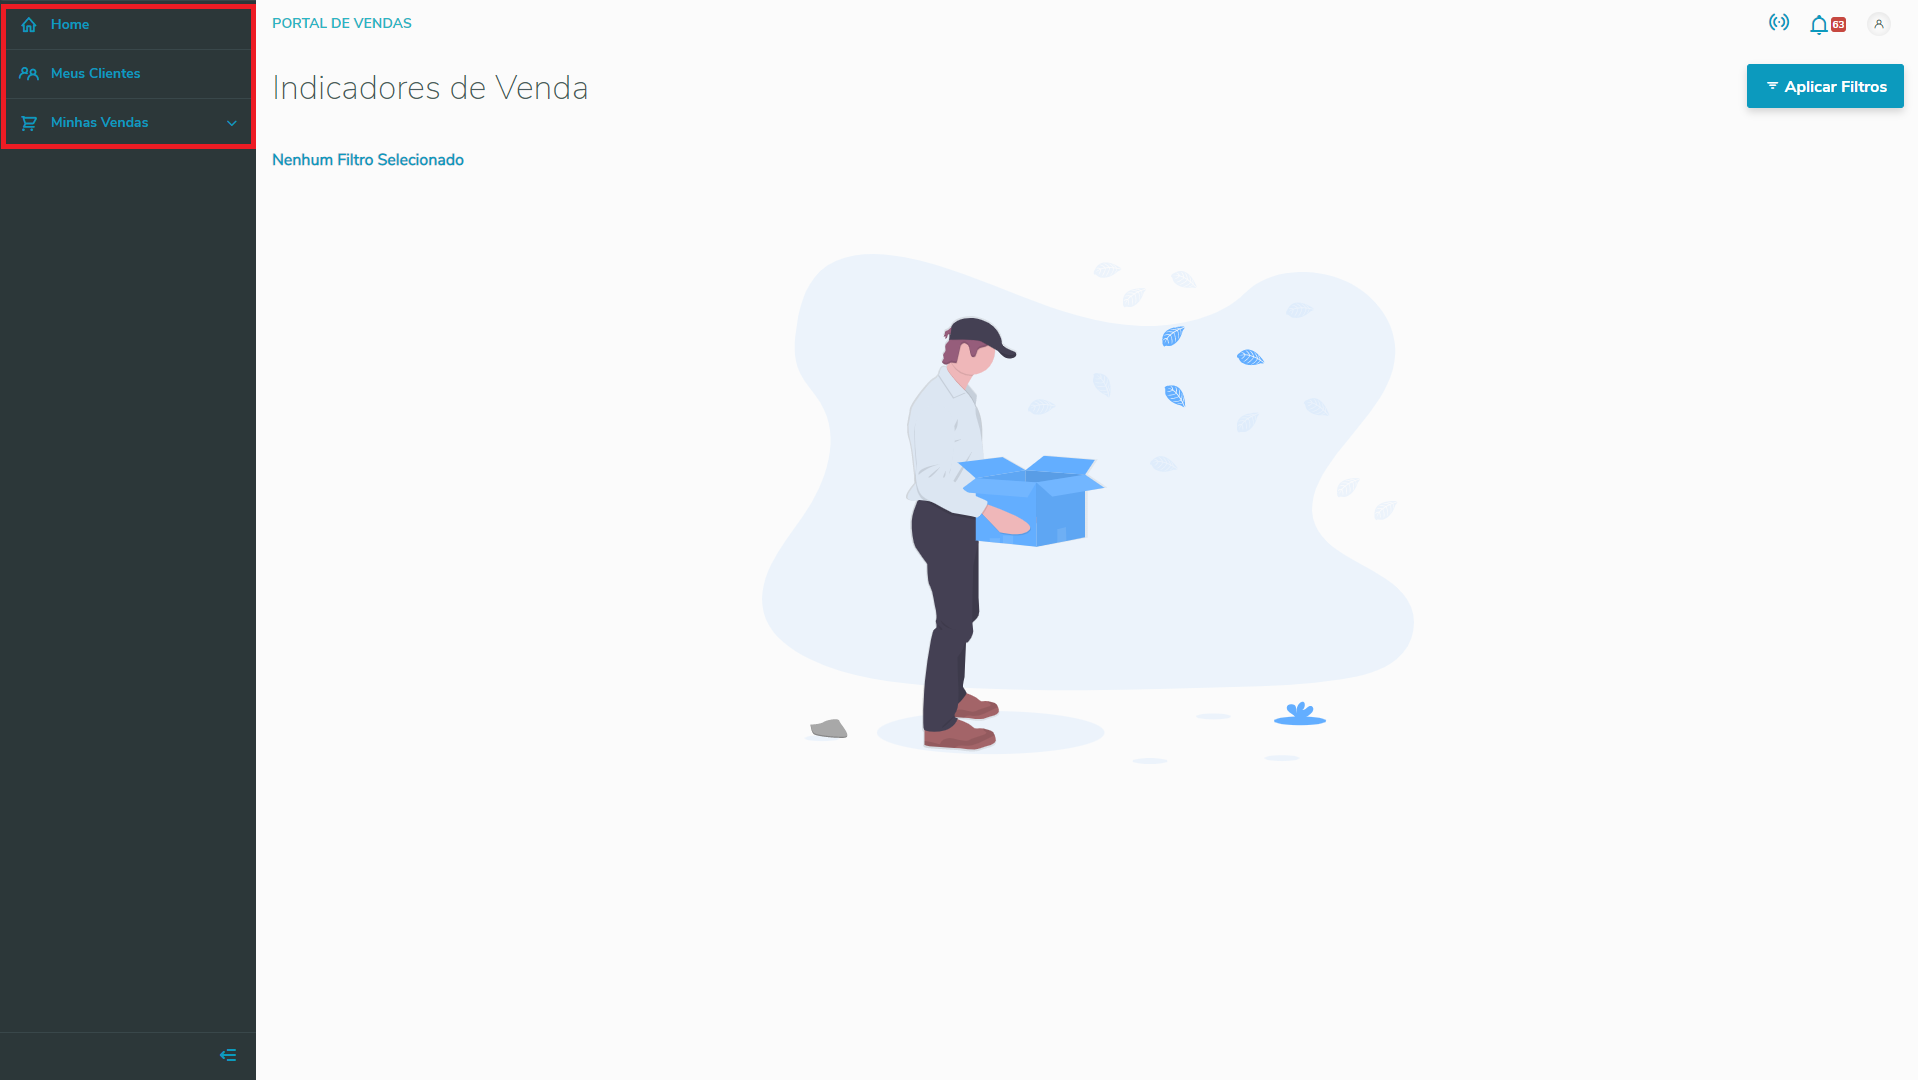
If the Sales Representative tries to access the page using the URL, the browser displays the screen below:
| Informações |
|---|
| Access permissions are loaded only when accessing the Sales Management Portal. |
| Informações |
|---|
If the user is already using the Sales Management Portal, they need to login again to receive privilege updates. |
|
|
| Informações |
|---|
| For further information on privileges, click here. |
|
| Expandir |
|---|
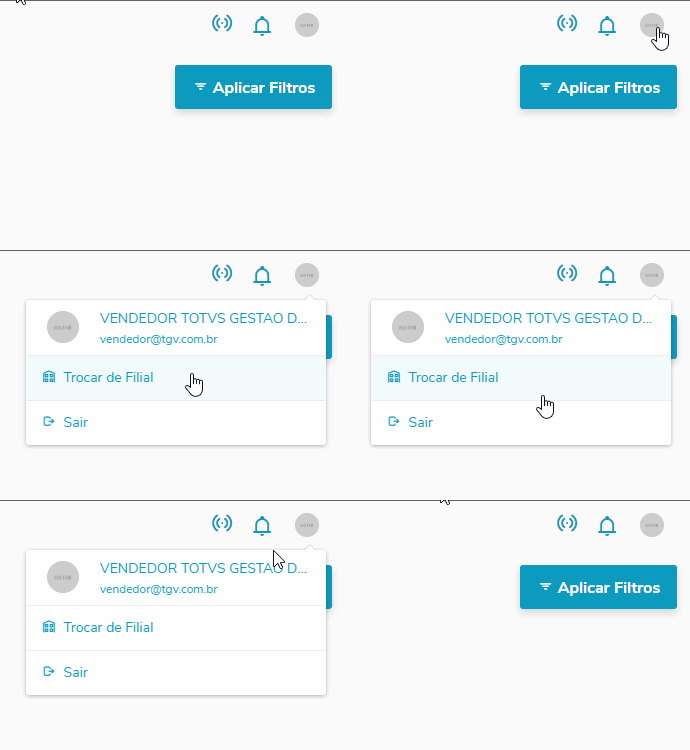
| The Sales Management Portal lets you change the branch used after Upon login, the system offers a Toolbar at the top. In it, you can find internet connection data (1st icon), notifications received (2nd icon) and logged sales representative (3rd icon).
| Totvs custom tabs box |
|---|
| tabs | Step 1, Step 2 |
|---|
| ids | branchChange1,branchChange2 |
|---|
| | Totvs custom tabs box items |
|---|
| default | yes |
|---|
| referencia | branchChange1 |
|---|
| In the toolbar, click the button with the user icon. The toolbar is located at the top of the page. Then, access the menu option Change Branch.
|
| Totvs custom tabs box items |
|---|
| default | no |
|---|
| referencia | branchChange2 |
|---|
| When you access the menu Change Branch, the system displays a window in which the Sales Representative can select the Company and Branch desired.
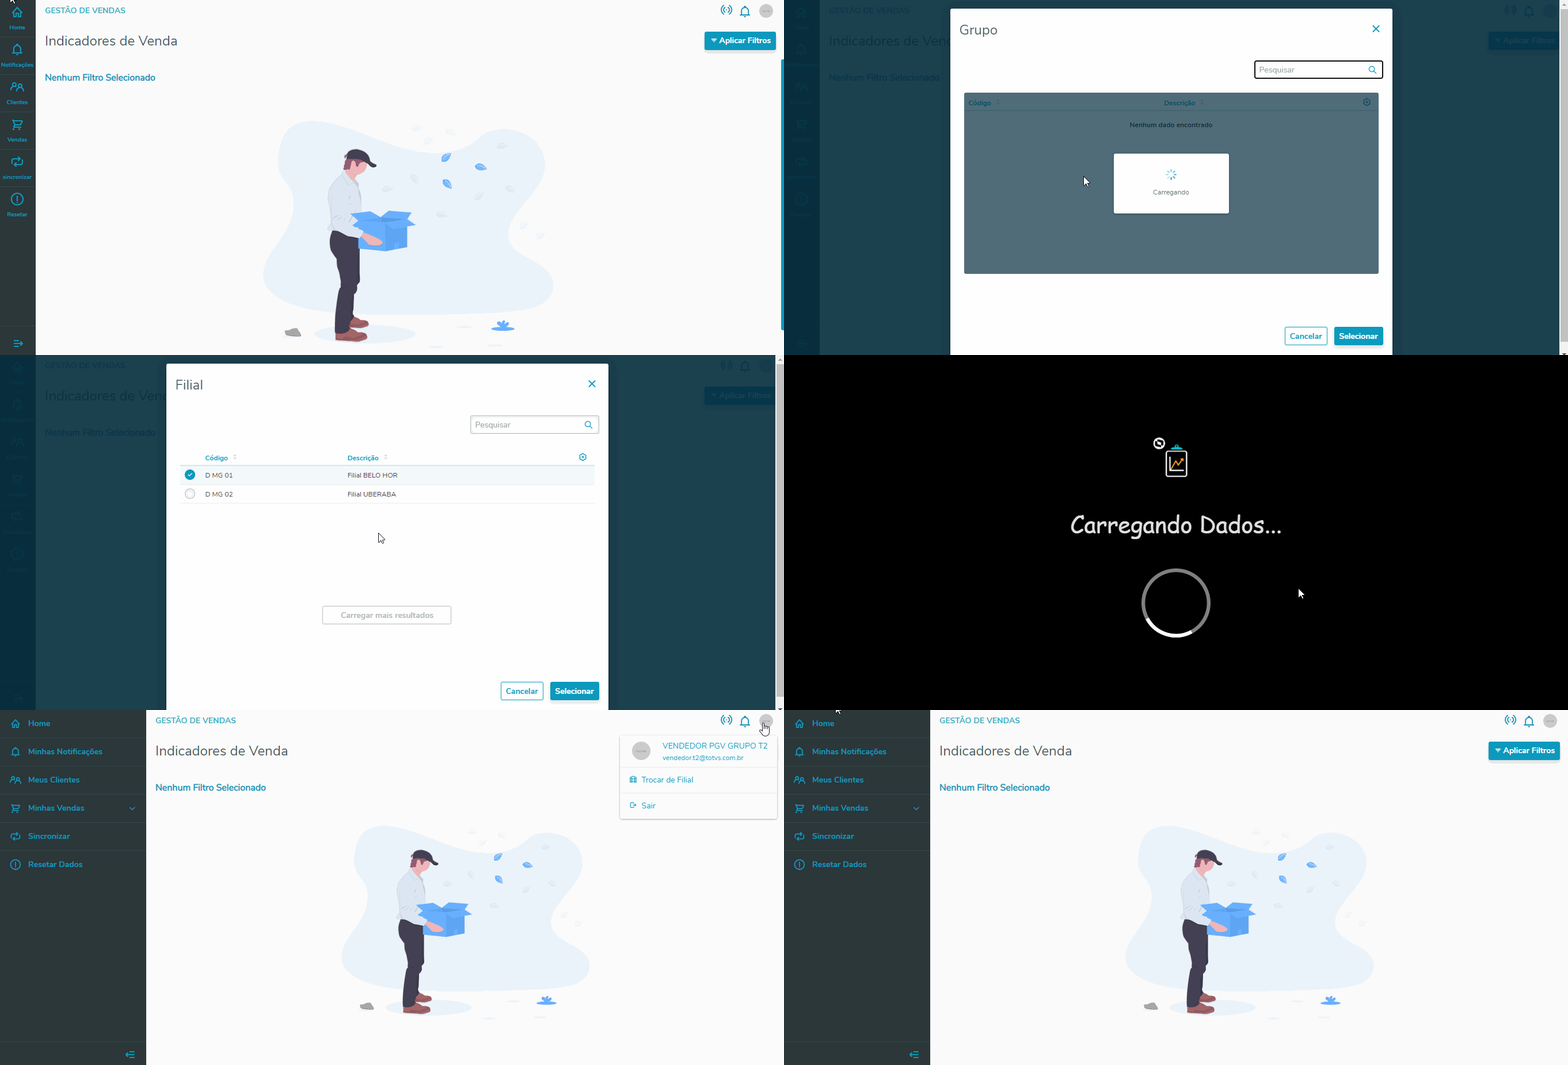
When clicking Confirm, the Sales Representative is diverted to the Data Load page of the Sales Management Portal.
| Informações |
|---|
Only Companies and Branches the Sales Representative can access in TOTVS Protheus Backoffice® are listed. |
|
|
| Aviso |
|---|
| To make branch changes possible, the user of the logged sales representative must also have a sales rep link at the target branch. |
|
| Expandir |
|---|
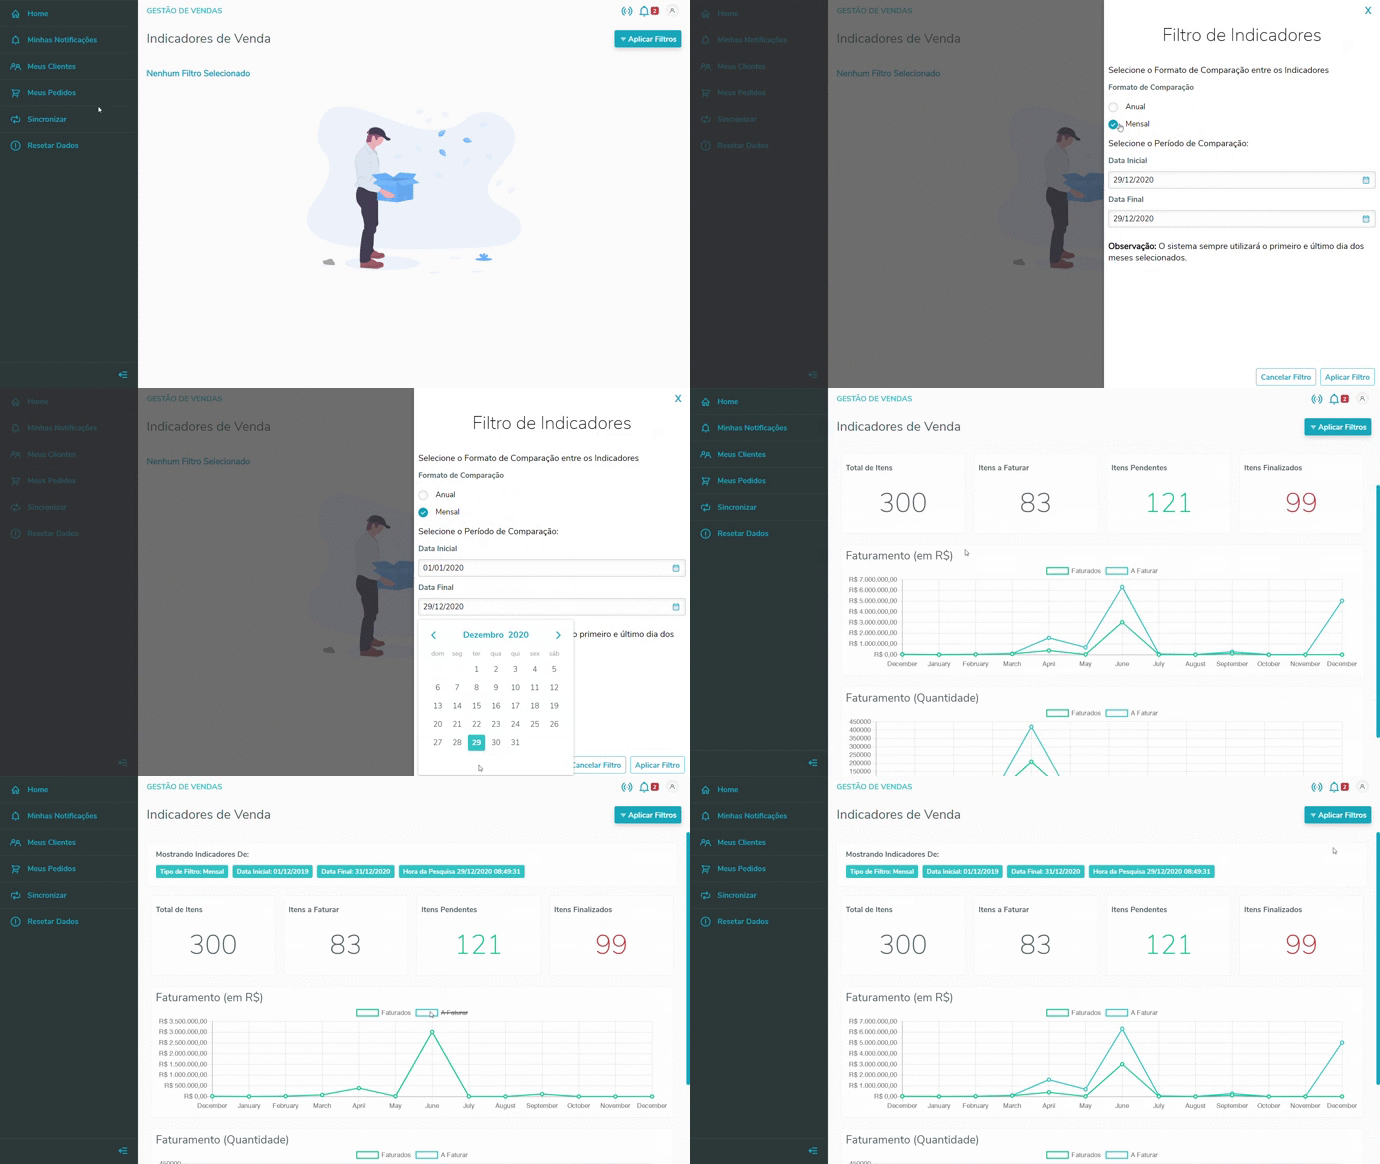
| When accessing the Home Page, you can view you Sales Indicators, which you can filter by period: Yearly or Monthly.
| Informações |
|---|
| - Upon selecting option Yearly, the Sales Representative can enter a period of up to ten years.
- Upon selecting option Monthly, the Sales Representative can enter a period of up to twelve months.
|
- For further information, click here to access the reference document of the routine.
|
| Expandir |
|---|
| When you access the My Notifications menu option, you can Query all your Notifications, which you may view in formats Table (Desktop Default) or Card (Mobile Default).
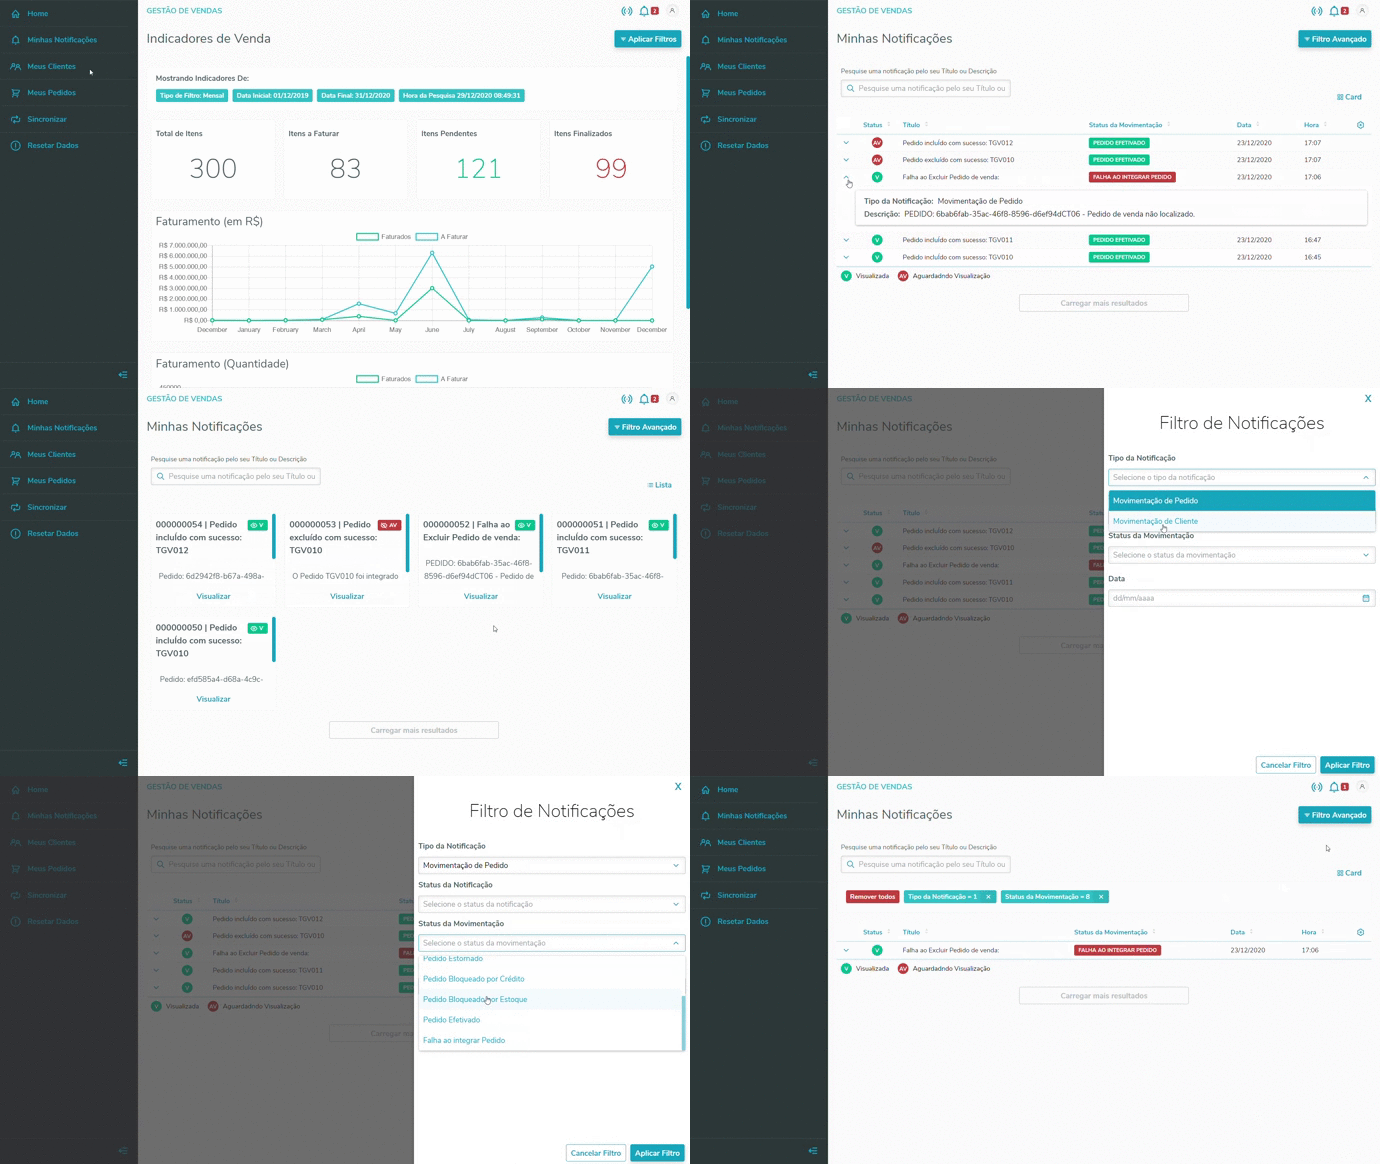
- For further information, click here to access the reference document of the routine.
|
| Expandir |
|---|
| When you access the My Customers menu option, you can Query your Customers, viewing their Financial Status and other Details through the option View Details.
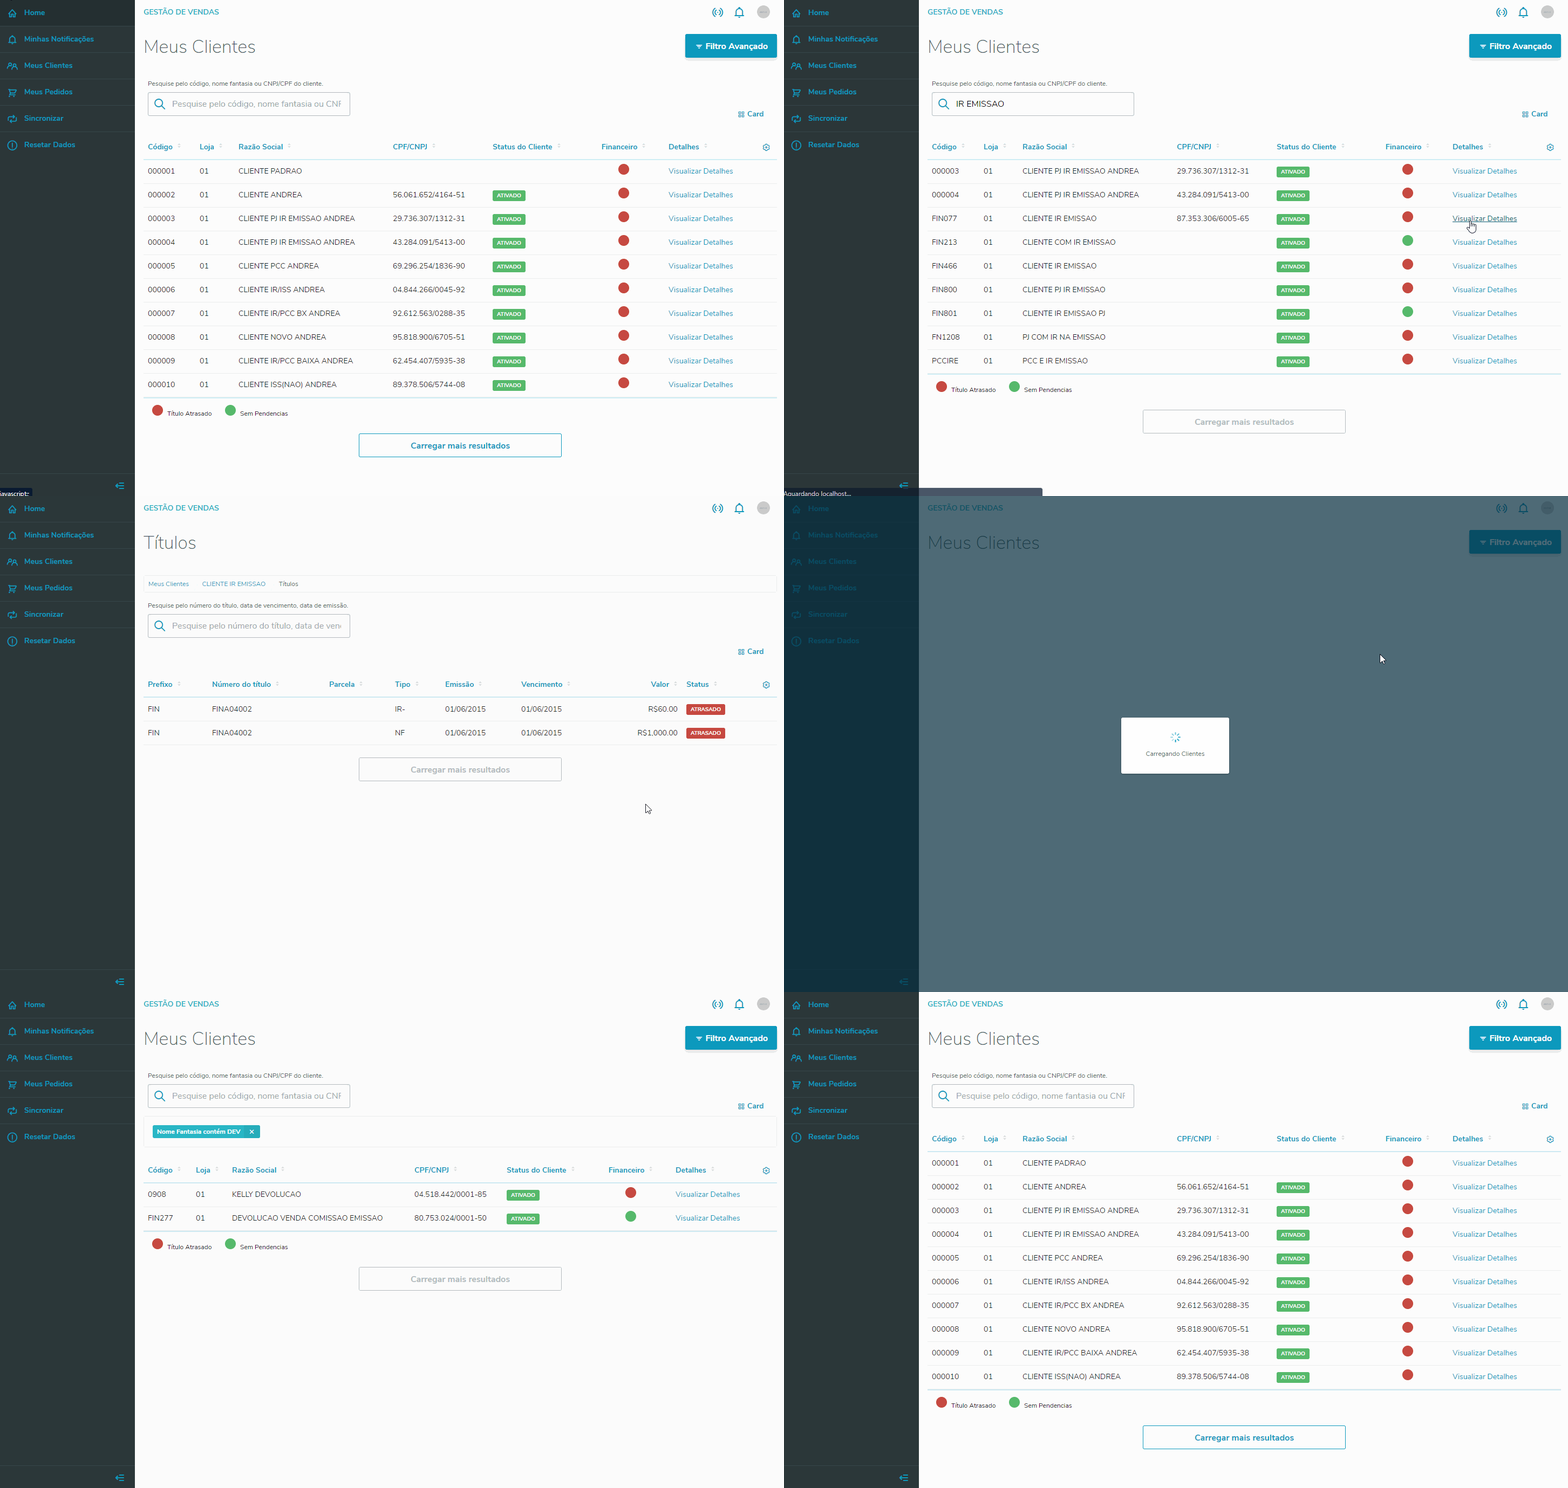
| Aviso |
|---|
Some features become available only if you are Online. |
- For further information, click here to access the reference document of the routine.
|
| Expandir |
|---|
| When you access the My Orders menu option, you can Query all your Sales Orders and also Add a New Order.
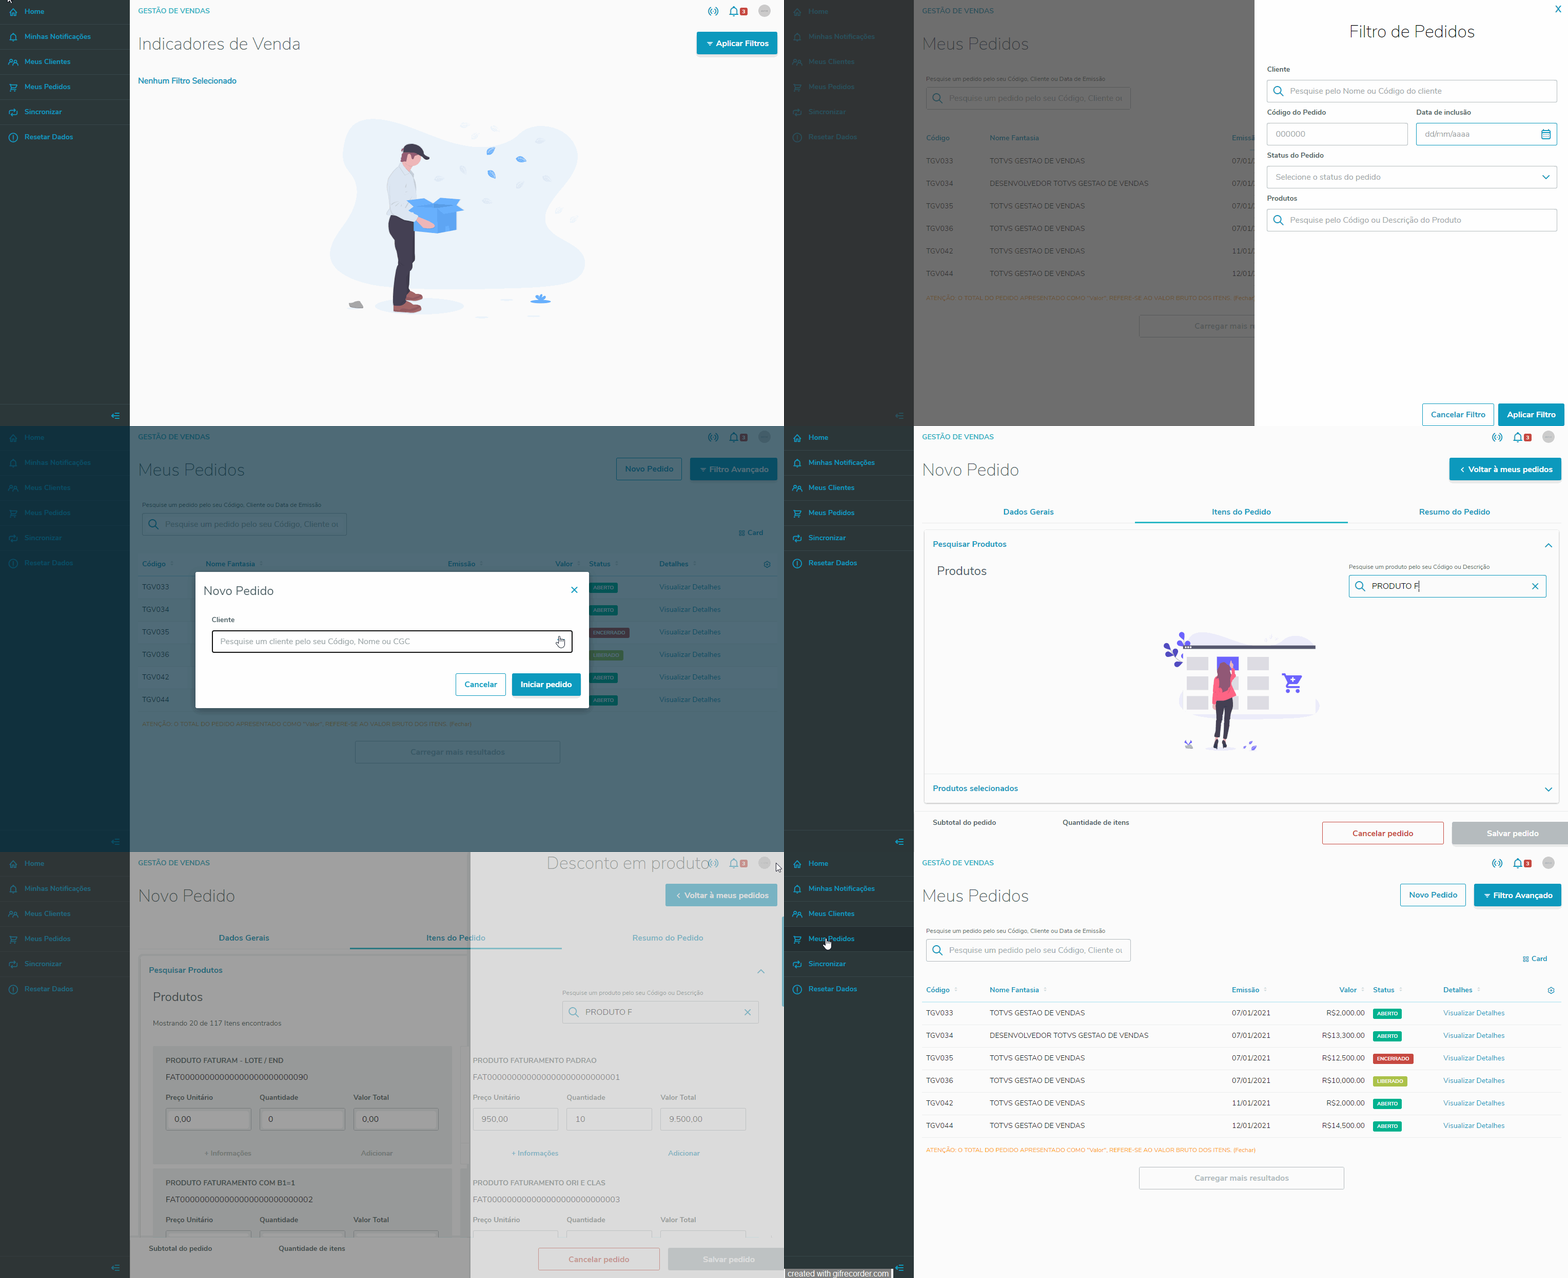
| Informações |
|---|
| When you access the option View Details, besides Viewing the Sales Order Summary, you can also access options Edit and Delete. |
- For further information, click here to access the reference document of the routine.
|
| Expandir |
|---|
| When you access the My Quotations menu option, you can Query all your Sales Quotations and also Add a New Quotation. 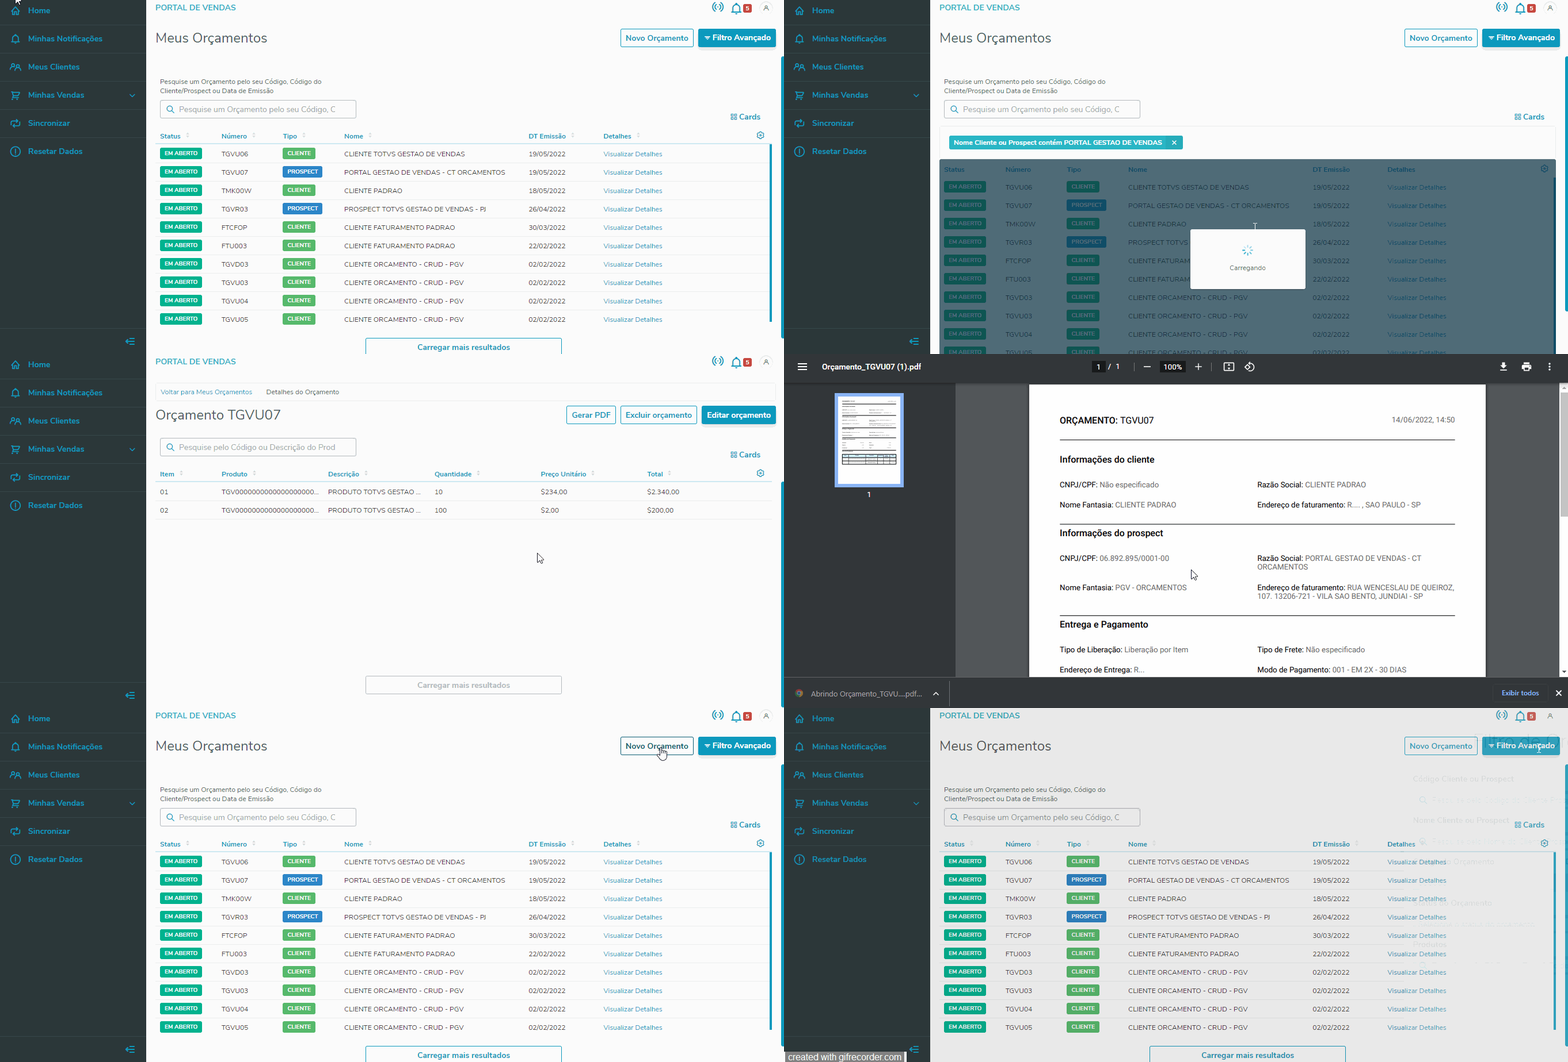
By clicking View Details, you can view information on the quotation and also Create a PDF, Edit and/or Delete the quotation. - For further information, click here to access the reference document of the routine.
|
|
|


