Aqui você pode visualizar um exemplo pratico das principais funcionalidades do Portal Gestão de VendasHere you can view a practical example of the main features of the Sales Management Portal.
| Expandir |
|---|
| Expandir |
|---|
| title | Privilégios | Privileges |
|---|
| In the Sales Management Portal, you can configure privileges for a user. These privileges are useful to tell the system which PGV menu options the user will be able to access. You may configure them using the options of routine TGVA004, as explained belowNo Portal Gestão de Vendas, é possível configurar privilégios para um usuário. Esses privilégios servem para dizer ao sistema à quais opções de menu do PGV o usuário terá acesso. Eles podem ser configurados utilizando as opções da rotina TGVA004, conforme instruções abaixo: | Informações |
|---|
| title | Importante! | Important |
|---|
| Privileges are loaded to the portal after the sales representative logs in. If you change the privilege, the change is reflected by the PGV only from the next login of the sales representative onwardsOs privilégios são carregados para o portal após o login do vendedor. Caso o privilégio seja alterado, a alteração será refletida no PGV apenas a partir do próximo login do vendedor. |
| Informações |
|---|
| title | Importante! | Important |
|---|
| The actions (Add, Edit and Delete) of the Sales Management Portal cannot be restrictedNão é possível restringir o acesso as ações (Incluir, Alterar e Excluir) do Portal Gestão de Vendas. |
| Totvs custom tabs box |
|---|
| tabs | Cadastro do Privilégio, Cadastro de Usuários, Adicionando o privilégio, Acessando o Privilege Register, Users Register, Adding the Privilege, Accessing the Portal |
|---|
| ids | passo1step1,passo2step2,passo3step3,passo4step4 |
|---|
| | Totvs custom tabs box items |
|---|
| default | yes |
|---|
| referencia | passo1 | step1 |
|---|
| To configure it, just access the Privileges menu, found in the Configurator module Para configurar, basta acessar o menu Privilégios, localizado no modulo Configurador (SIGACFG) → Usuários Users → Senhas Passwords → Privilégios Privileges → IncluirAdd: - Em Regras por transação/rotina, preencha o campo Transação/Rotina com o código da rotina TGVA004.
- Em Funcionalidades das transações/rotina selecione se o usuário (Vendedor) terá acesso Permitido ou Negado aos itens do menu do Portal Gestão de Vendas.
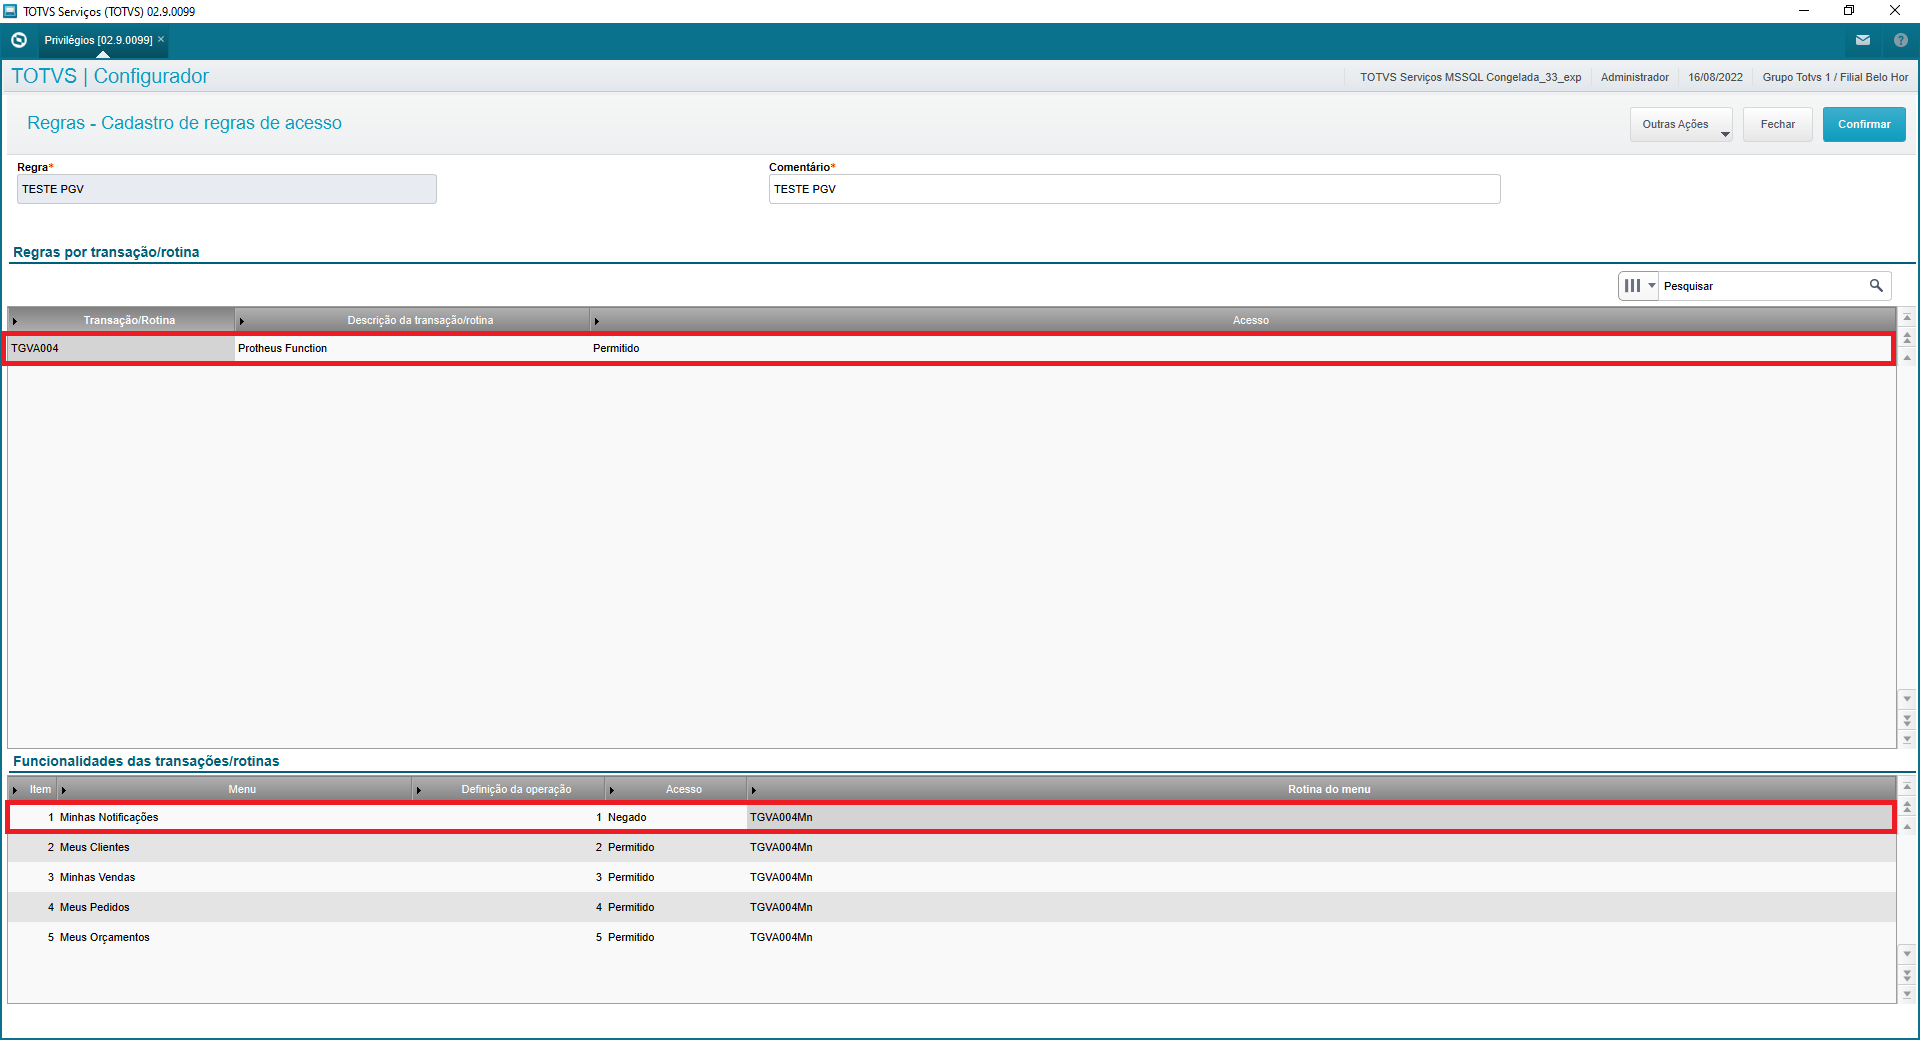 Image Removed Image Removed
- In Rules by Transaction/Routine, fill out the field Transaction/Routine with the code of routine TGVA004.
- In Features of Transactions/Routine, select whether the user (Sales Representative) will have access Allowed or Denied to Sales Management Portal menu items.
Image Added In this example, access to the My Notifications page will be deniedNeste exemplo, será negado acesso a página de Minhas Notificações. |
| Totvs custom tabs box items |
|---|
| default | no |
|---|
| referencia | passo2 | step2 |
|---|
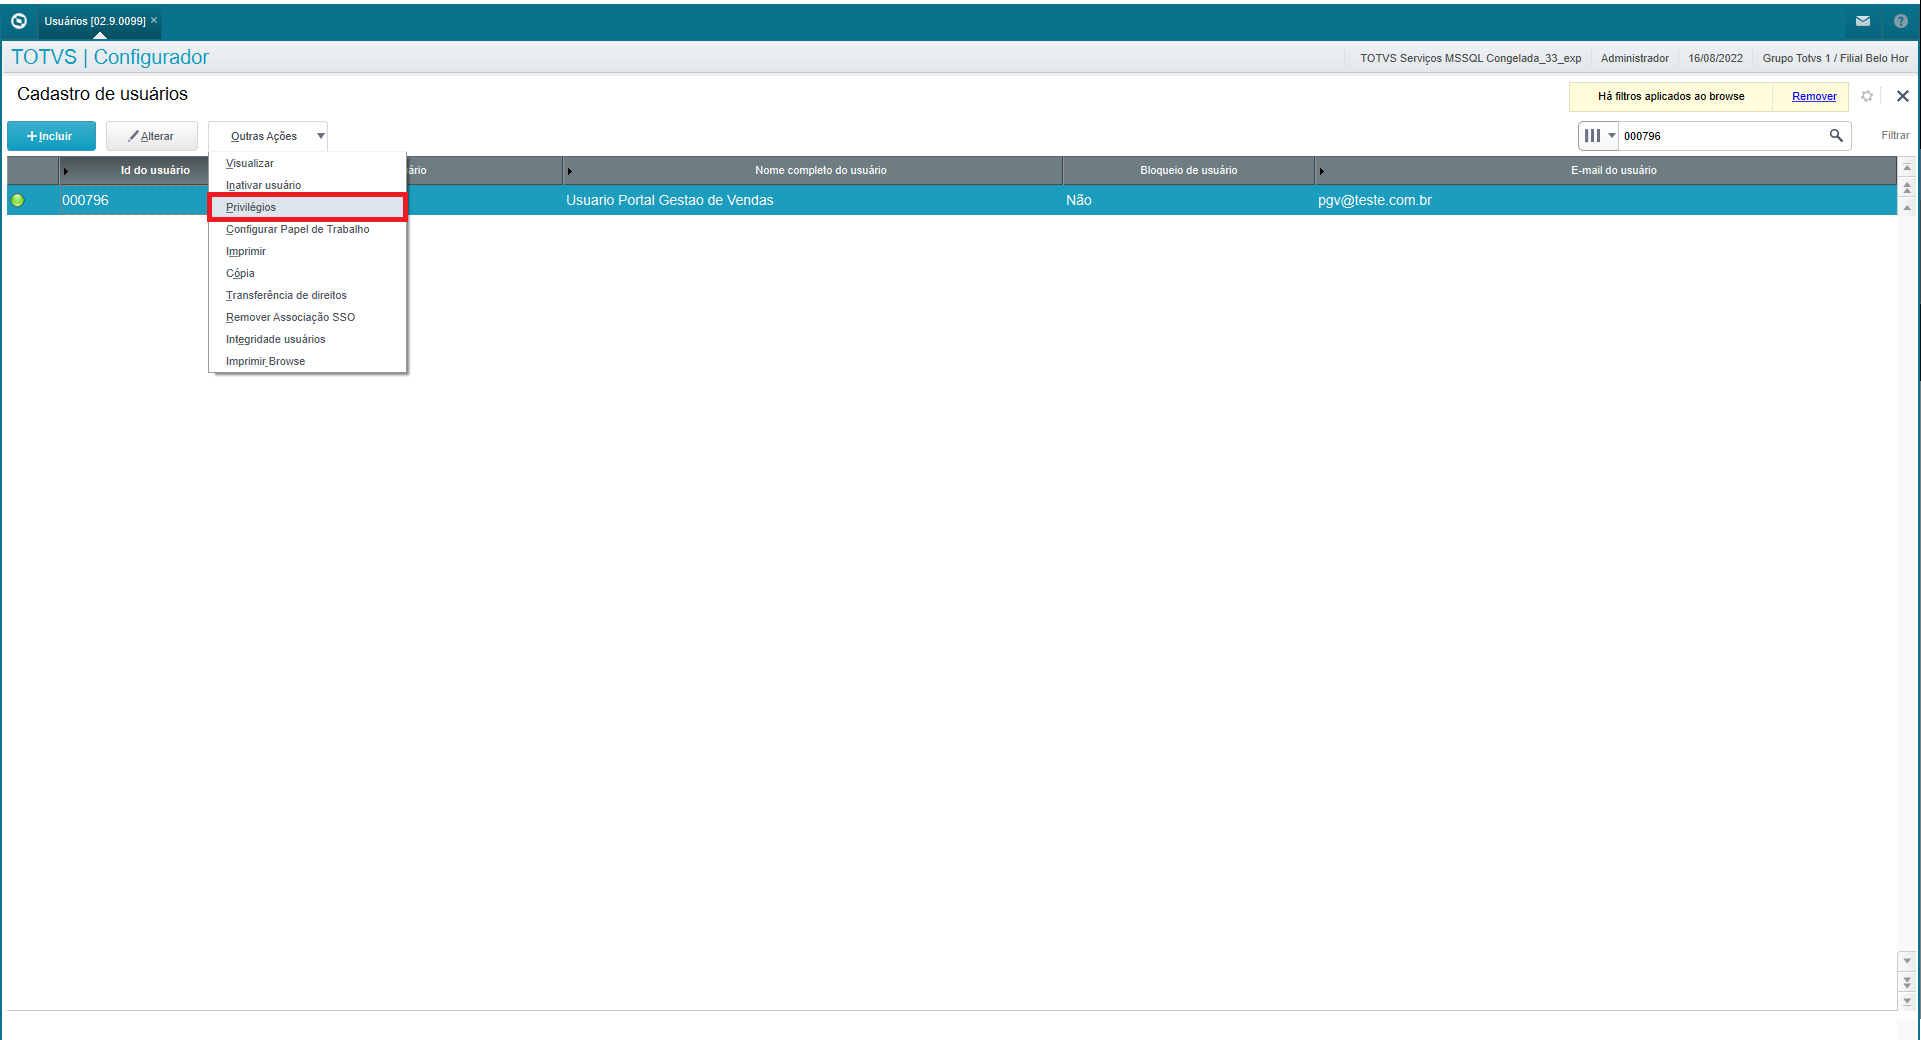
| Access the users register of the Configurator module (SIGACFG) and add the privilege to the user selectedAcesse o cadastro de usuários do modulo Configurador (SIGACFG) e adicione o privilégio ao usuario selecionado. SIGACFG → Usuários Users → Senhas Passwords → Usuários → Localizar o usuário desejado → Outras Ações → PrivilégiosUsers → Find the user desired → Other Actions → Privileges
|
| Totvs custom tabs box items |
|---|
| default | no |
|---|
| referencia | passo3 | step3 |
|---|
| In Access Restrictions select the previously registered rule (Step Em Restrições de acesso selecione a regra cadastrada anteriormente (Passo 1). 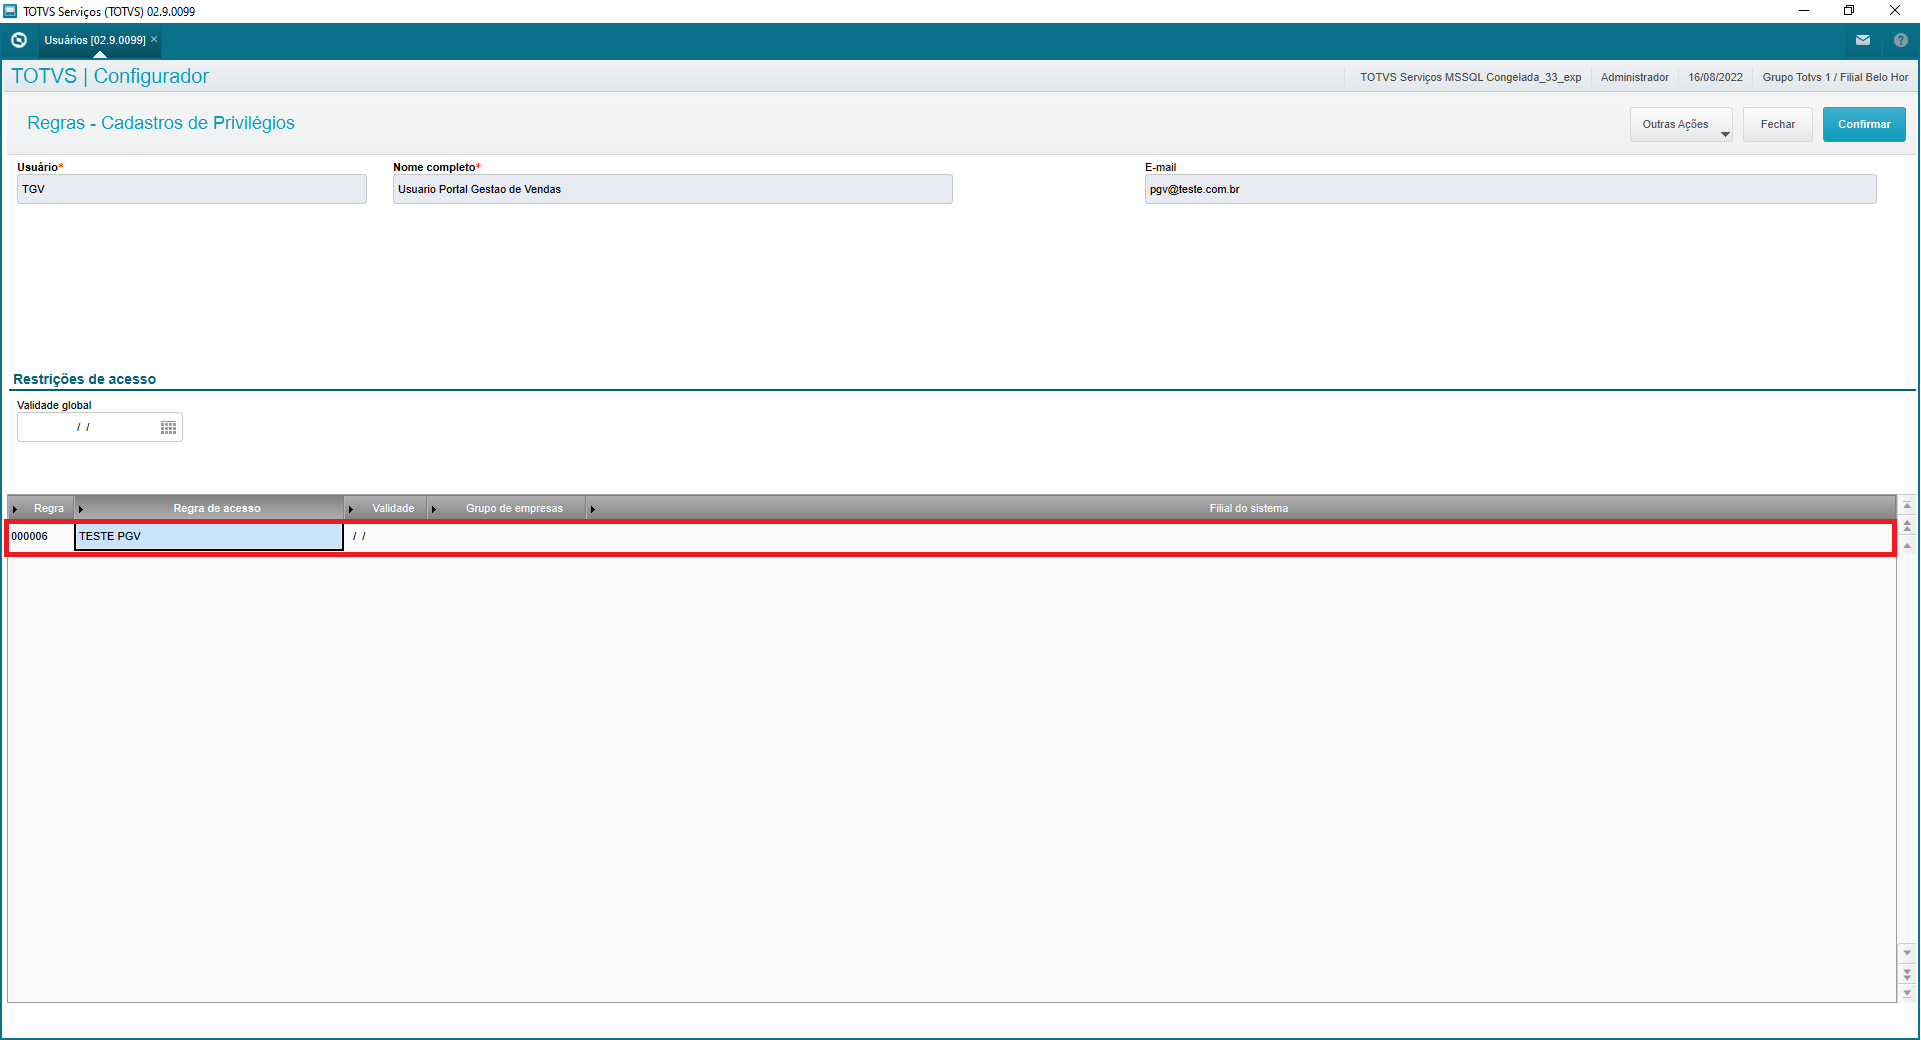
|
| Totvs custom tabs box items |
|---|
| default | no |
|---|
| referencia | passo4 | step4 |
|---|
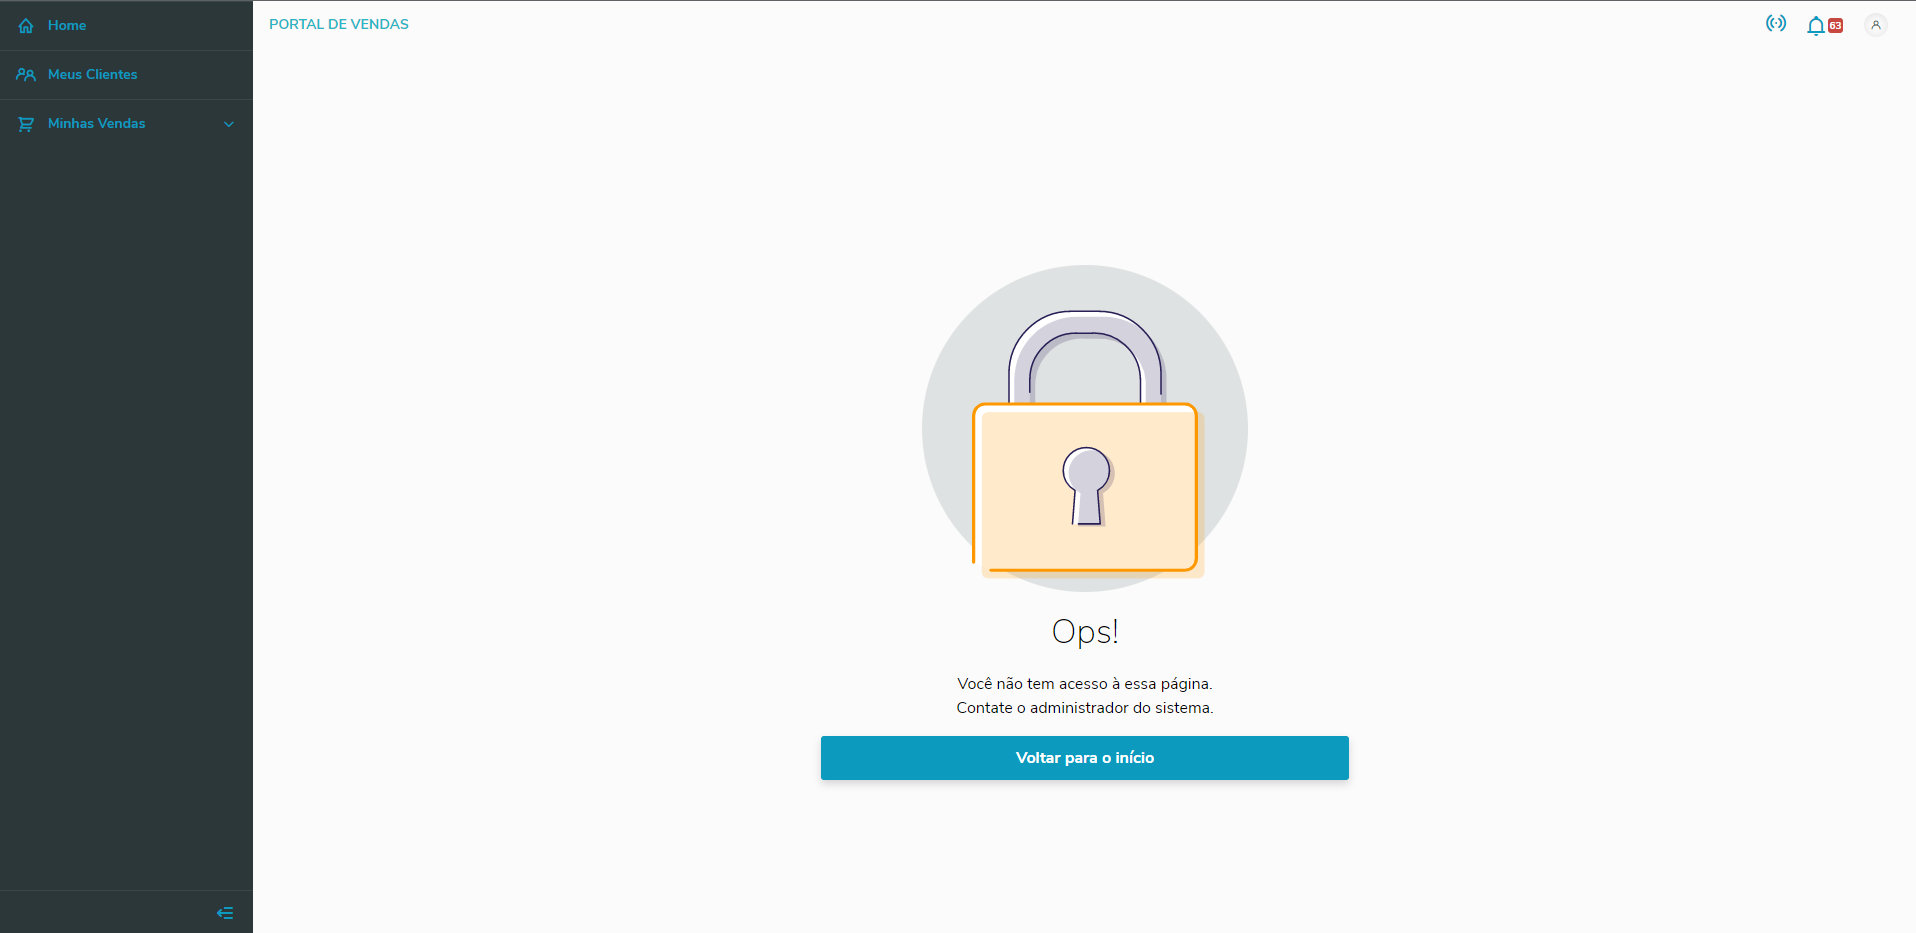
| Upon accessing the Sales Management Portal, the Sales Representative will neither have access to the page nor to the menu. In this example, the Sales Representative lacks access to the page My Notifications.
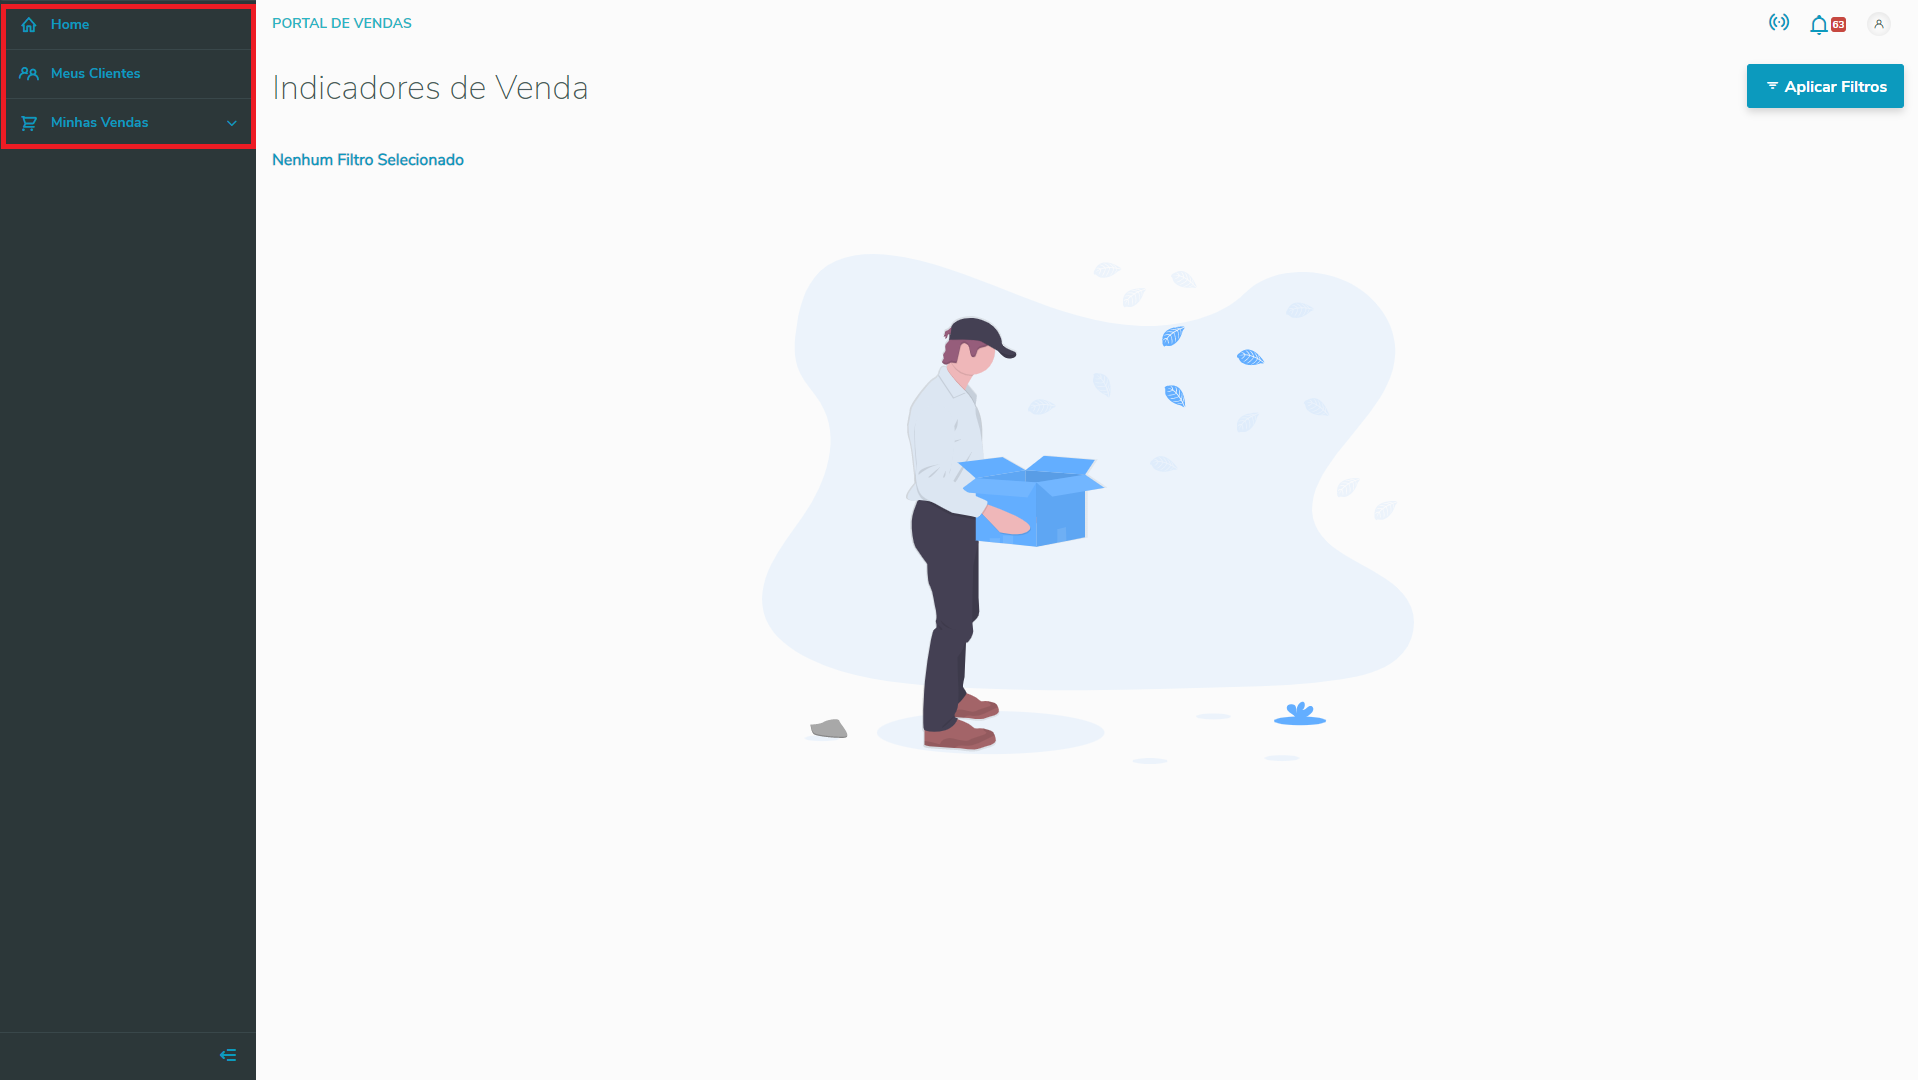 Image Added Image Added
If the Sales Representative tries to access the page using the URL, the browser displays the screen below Ao acessar o portal Gestão de vendas o Vendedor não terá acesso a página e também ao menu, neste exemplo o Vendedor não possui acesso a página Minhas Notificações. Image Removed Caso o Vendedor tente acessar a página utilizando a URL no navegador será exibido a tela abaixo:
| Informações |
|---|
| As permissões de acessos são carregadas somente ao acessar o Portal Gestão de Vendas. | | Access permissions are loaded only when accessing the Sales Management Portal. |
| Informações |
|---|
If the user is already using the Sales Management Portal, they need to login again to receive privilege updates | | Informações |
|---|
Caso o usuário já esteja utilizando o portal Gestão de vendas, será necessário efetuar um login novamente para receber as atualizações dos privilégios. |
|
|
| Informações |
|---|
| title | Privilégios | Privileges |
|---|
| For further information on privileges, click herePara maiores informações sobre os privilégios, clique aqui. |
|
| Expandir |
|---|
| title | Troca de Filial | Branch Change |
|---|
| The Sales Management Portal lets you change the branch used after Upon login, the system offers a Toolbar at the top. In it, you can find internet connection data (1st icon), notifications received (2nd icon) and logged sales representative (3rd icon O portal Gestão de vendas permite trocar a filial utilizada após Ao realizar o Login, o sistema possui um Toolbar (barra de ferramentas) na parte superior. Nele temos as informações de conexão com a internet (1° ícone), notificações recebidas (2° ícone) e vendedor logado (3° ícone).
| Totvs custom tabs box |
|---|
| tabs | Passo Step 1, Passo Step 2 |
|---|
| ids | trocaFilial1branchChange1,trocaFilial2branchChange2 |
|---|
| | Totvs custom tabs box items |
|---|
| default | yes |
|---|
| referencia | trocaFilial1 | branchChange1 |
|---|
| In the toolbar, click the button with the user icon. The toolbar is located at the top of the page. Then, access the menu option Change Branch Na barra de ferramentas, clique no botão com o ícone de usuário. A barra de ferramentas esta localizada na parte superior da página. Em seguida acesse a opção de menu Trocar de Filial.
|
| Totvs custom tabs box items |
|---|
| default | no |
|---|
| referencia | trocaFilial2 | branchChange2 |
|---|
| When you access the menu Change Branch, the system displays a window in which the Sales Representative can select the Company and Branch desired.
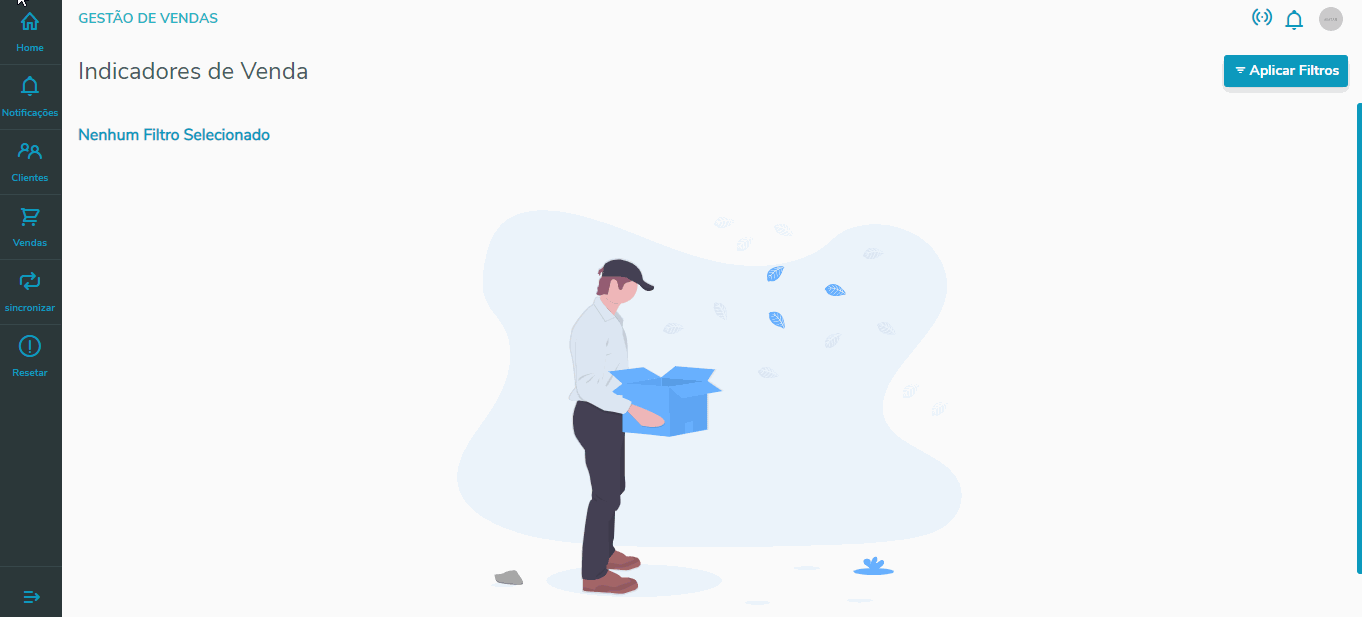 Image Added Image Added
When clicking Confirm, the Sales Representative is diverted to the Data Load page of the Sales Management Portal.
| Informações |
|---|
Only Companies and Branches the Sales Representative can access in TOTVS Protheus Backoffice® are listed |
Ao acessar o menu Trocar de Filial será apresentado um janela onde o Vendedor poderá selecionar a Empresa e Filial desejada. Image Removed Ao clicar no botão Confirmar o Vendedor será redirecionado para a página de Carga de Dados do Portal Gestão de vendas. | Informações |
|---|
São listadas somente Empresas e Filiais que o Vendedor possui acesso no TOTVS BackOffice Protheus®. |
|
|
| Aviso |
|---|
| title | Restrição de Acesso | Access Restriction |
|---|
| To make branch changes possible, the user of the logged sales representative must also have a sales rep link at the target branchPara que seja possível a troca de filial, o usuário do vendedor logado deve ter vínculo de vendedor na filial de destino também. |
|
| Expandir |
|---|
| title | Indicadores de Vendas | Sales Indicators |
|---|
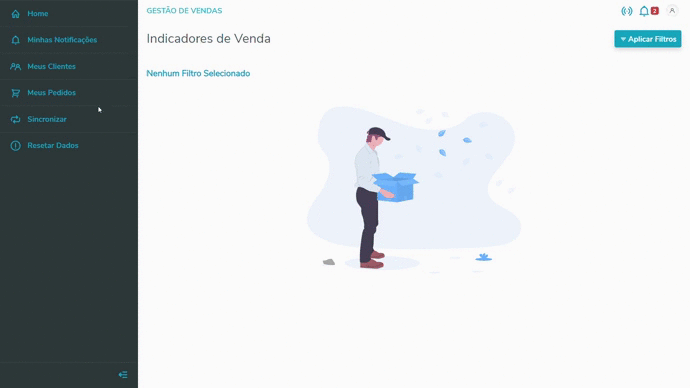
| When accessing the Home Page, you can view you Sales Indicators, which you can filter by period: Yearly or MonthlyAo acessar a Página Inicial (Home) o Usuário pode visualizar os seus Indicadores de Vendas, podendo filtrar pelos períodos: Anual ou Mensal.
| Informações |
|---|
| title | Filtro de Indicadores |
|---|
| - Ao selecionar a opção Anual o Vendedor pode informar um período de até dez anos.
- Ao selecionar a opção Mensal o Vendedor pode informar um período de até doze meses.
| | - Upon selecting option Yearly, the Sales Representative can enter a period of up to ten years.
- Upon selecting option Monthly, the Sales Representative can enter a period of up to twelve months.
|
- For further information, click here to access the reference document of the routinePara maiores informações acesse o documento de referencia desta rotina clicando aqui.
|
| Expandir |
|---|
| title | Minhas Notificações | My Notifications |
|---|
| When you access the My Notifications menu option, you can Query all your Notifications, which you may view in formats Table (Desktop Default) or Card (Mobile Default).
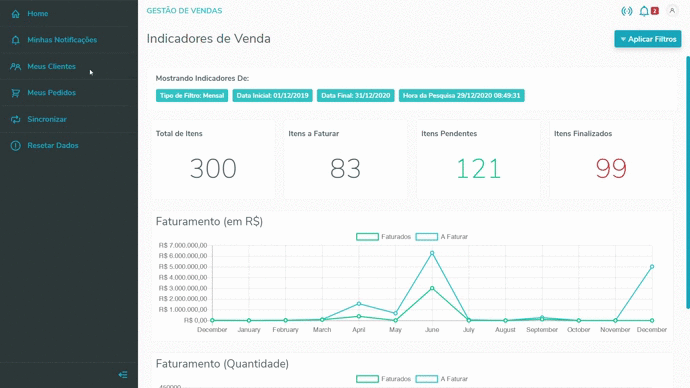 Image Added Image Added
- For further information, click here to access the reference document of the routine
Ao acessar a opção de menu Minhas Notificações, o Usuário pode Consultar todas as suas Notificações, tendo como opção visualizar no formato de Tabela (Padrão Desktop) ou Card (Padrão Mobile). Image Removed - Para maiores informações acesse o documento de referencia desta rotina clicando aqui.
|
| Expandir |
|---|
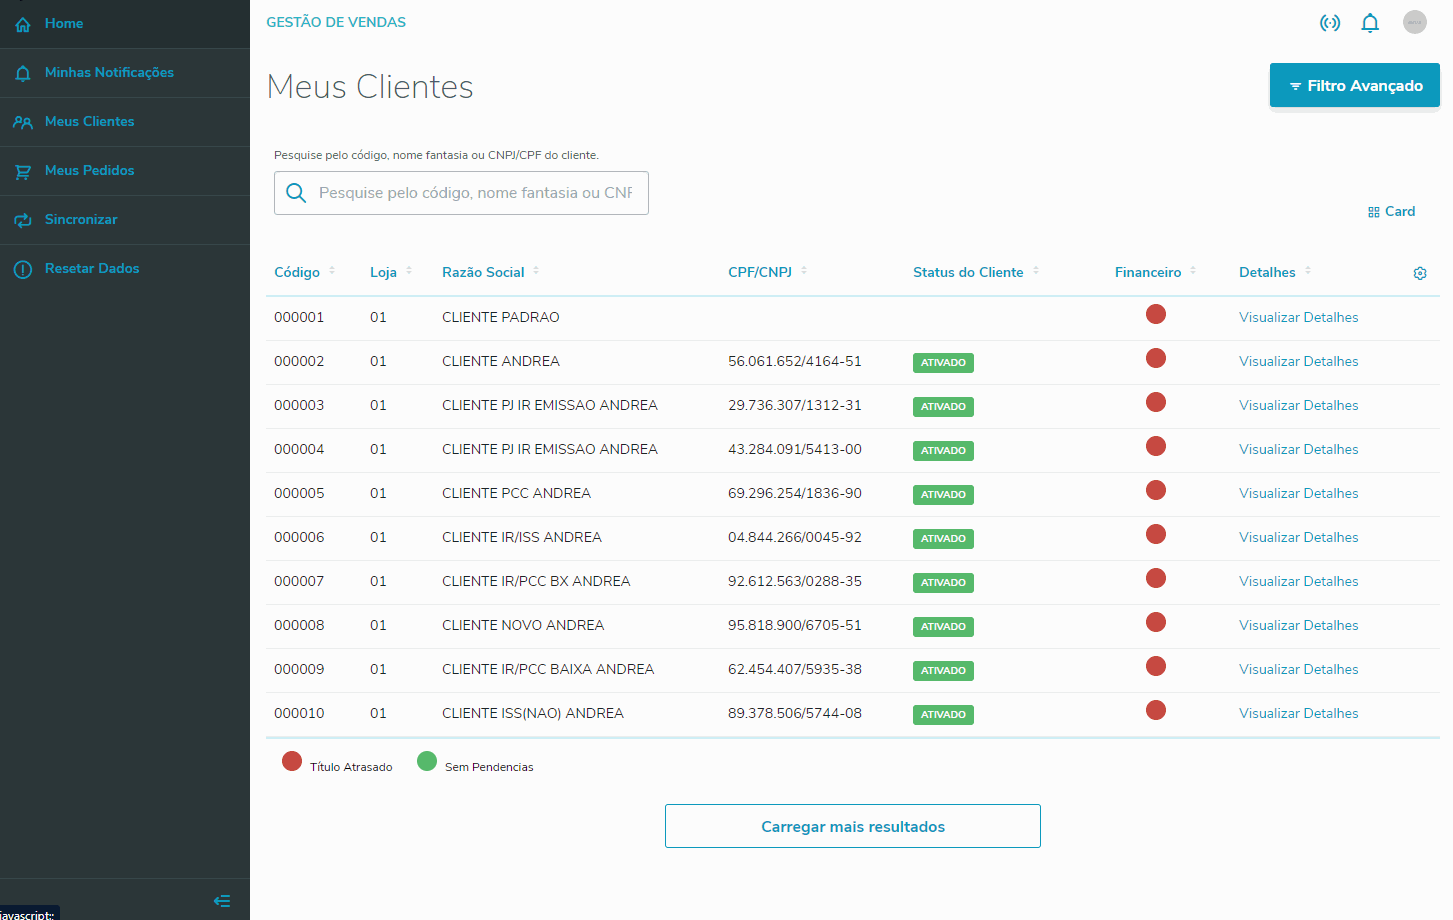
| title | Meus Clientes | My Customers |
|---|
| When you access the My Customers menu option, you can Query your Customers, viewing their Financial Status and other Details through the option View DetailsAo acessar a opção de menu Meus Clientes, o Usuário Consultar os seus Clientes, podendo visualizar o Status Financeiro e os demais Detalhes do Cliente através da opção Visualizar Detalhes.
| Aviso |
|---|
Algumas funcionalidades estarão disponíveis apenas se o Usuário estiver Online. | Some features become available only if you are Online. |
- For further information, click here to access the reference document of the routinePara maiores informações acesse o documento de referencia desta rotina clicando aqui.
|
| Expandir |
|---|
| title | Meus Pedidos | My Orders |
|---|
| When you access the My Orders menu option, you can Query all your Sales Orders and also Add a New OrderAo acessar a opção de menu Meus Pedidos, o Usuário pode Consultar todos os seus Pedidos de Vendas e também Incluir um Novo Pedido.
| Informações |
|---|
| Ao acessar a opção Visualizar Detalhes o Usuário além de Visualizar o Resumo do Pedido de Venda, poderá acessar as opções Alterar e Excluir. | | When you access the option View Details, besides Viewing the Sales Order Summary, you can also access options Edit and Delete. |
- For further information, click here to access the reference document of the routinePara maiores informações acesse o documento de referencia desta rotina clicando aqui.
|
| Expandir |
|---|
| Ao acessar a opção de menu Meus Orçamentos, o usuário pode consultar todos os seus Orçamentos de Venda e/ou incluir um Novo Orçamento: 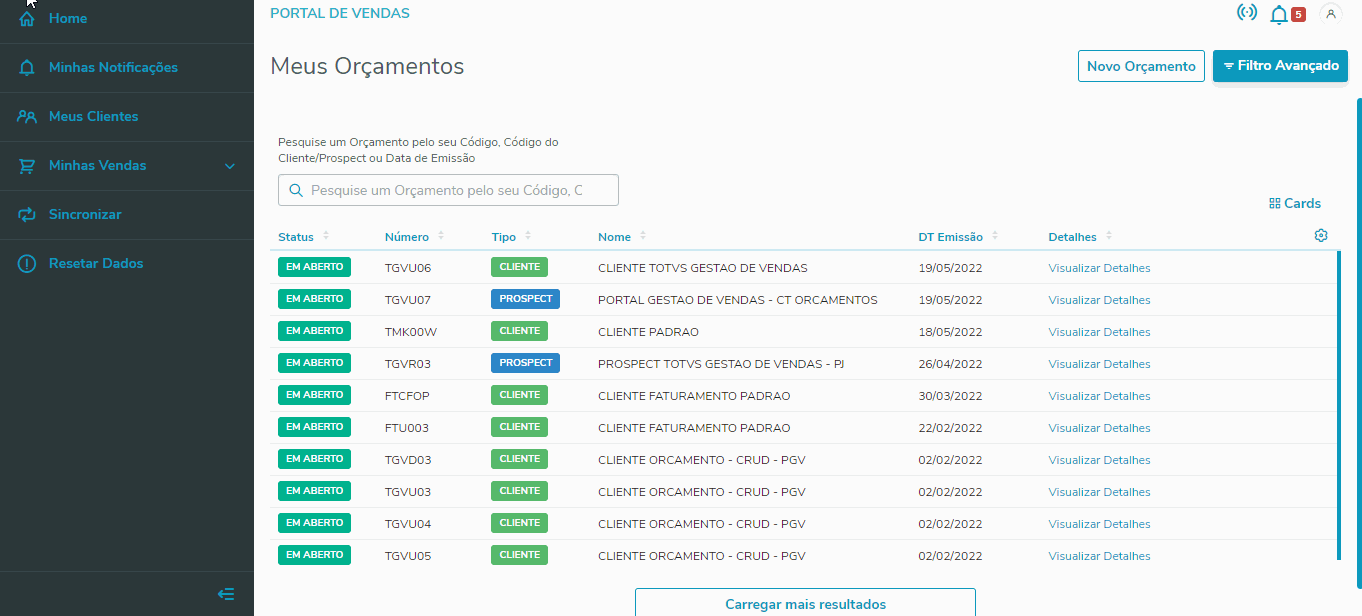 Image Removed Image Removed
Clicando em 'Visualizar Detalhes', é possível visualizar as informações do orçamento e também Gerar PDF, Alterar e/ou Excluir o orçamento. - Para maiores informações acesse o documento de referencia desta rotina clicando aqui.
|
|
|